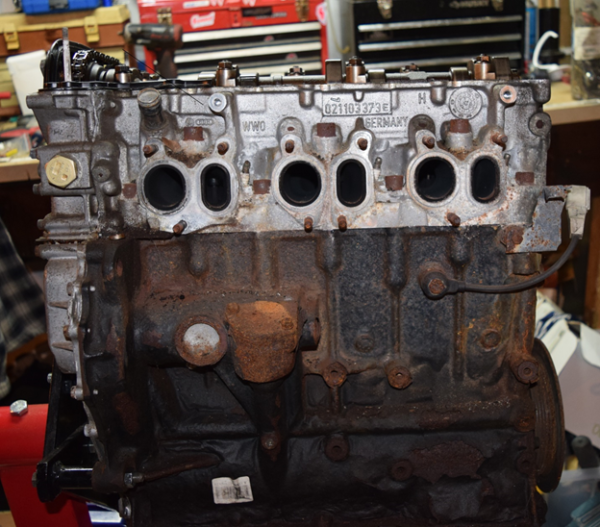
This is a 12 valve 2.8L VR6 engine out of a 2001 Volkswagen Jetta. This engine can be particularly complicated to tear down due to the rear engine timing and the need of a few special tools. Having a rear timing camshaft makes for some difficulties when removing the lower timing cover. For this, there are stand adapters for the mounting points to be moved to the side of the engine instead of using transmission mounting points. In this article, we will be using a regular transmission mounting point.
Tools Required:
- Basic Metric Socket Set
- Large breaker bar
- Impact gun for balancer bolt (optional)
- 5mm Allen key
- 6mm Allen key
- 12mm deep triple square socket
- 10mm triple square socket
- 27mm Socket (For the timing chain tensioner & harmonic balancer bolt)
- Dead blow hammer or rubber mallet
- Permanent marker
- Plastic zip lock bags of various sizes
- Flat head screw driver
Step 1: Index, Tag, and Organize the Engine Parts
To start, you want to simply remove all accessories, pulleys, and other pieces to get the engine down to just the long block. Then drain all the fluids.
NOTE: The intake manifold uses a 5mm hex bolt (i.e. Allen head bolt). You will need a 5mm hex socket driver with extension or a long T-handle style hex driver to remove these.
Once your block is reduced to a long block, you are now ready to tear down your engine. Before writing this article I had already reduced this engine to a long block, so all photos were taken after that point.
Before you start unbolting things, most overhead camshaft engines will have a particular order for removing parts. It is not as simple as going from top to bottom. The first step is to get your permanent marker and plastic bags. The most important rule for an engine tear down is to index, bag, and tag everything you remove. This is particularly useful if you plan to re-assemble it in the future. This is also a good time to loosen your crank bolt with an impact gun. Having the resistance of the rotating assembly and valve train will aid in getting that bolt loose.
Step 2: Remove the Valve Cover
The front of the engine will have two long studs, and you will need a deep socket or an open-end wrench to loosen them. These VR6s have the plastic version of the valve cover and can be brittle depending on the engine’s age. Use a soft mallet to tap on corners of the cover in conjunction with plastic pry tools if needed.
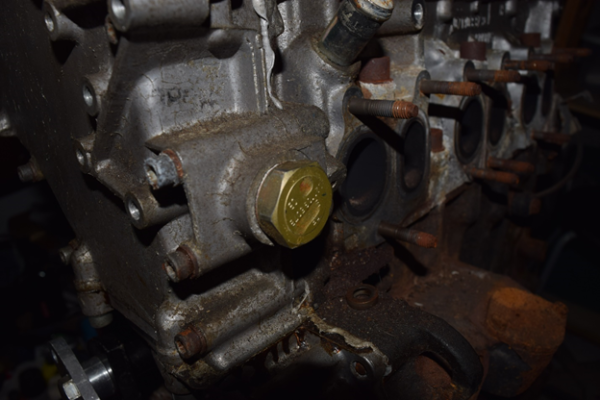
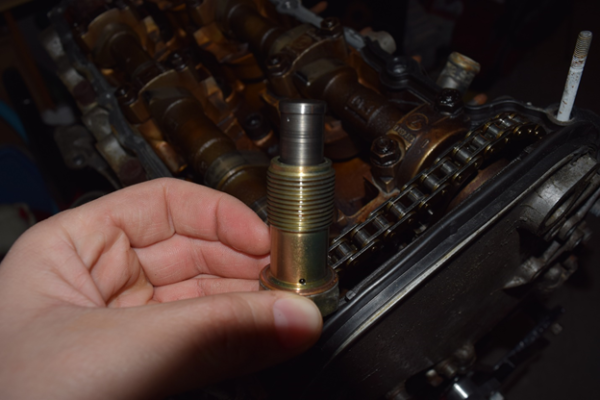
Step 3: Remove the Upper Chain Tensioner
This is 27mm. You can use a socket wrench or an adjustable wrench on this part. They are not torqued down too tightly and should come loose fairly easily.
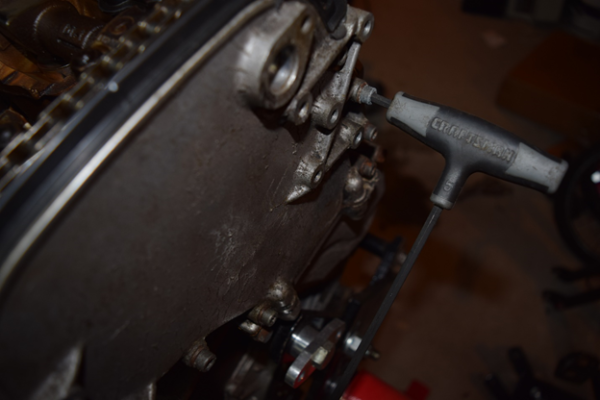
Step 4: Remove the Upper and Lower Timing Cover Bolts and Chain
To remove the timing cover, you will apply light hand pressure outward and tap on corners of the front cover with a dead blow hammer or a rubber mallet. From the factory, these covers do not have a solid gasket; they use a liquid gasket. The liquid gasket can be hard to break at times, so take your time and make sure all bolts are removed.
If you are using a conventional engine stand mount, the lower timing cover can be difficult to access, but it can be done. If you cannot access these bolts, then you will not be able to remove the crankshaft. Remove all pistons so the engine block is at its lightest. Remove it from the stand and mount to gain access to the bolts. You can then return the engine to the stand.
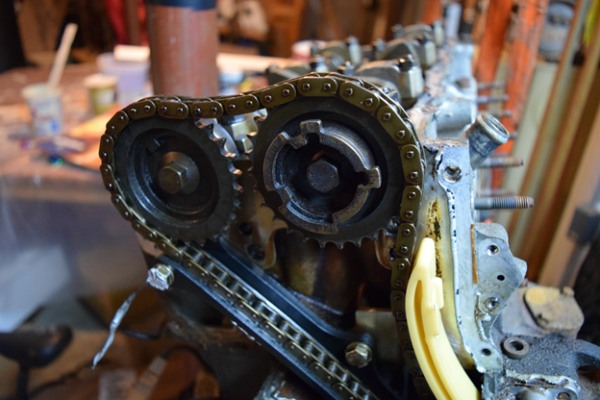
You will now want to remove the black upper chain guide. Once the bolts are removed, you can pull the black chain guide out. Depending on your engine’s timing position, the chain can be removed without removing a camshaft gear by grabbing the slack side of the chain and removing it from the exhaust side camshaft gear first. Lay the chain to the side of the housing. Do not drop it into the lower cover.
Step 5: Removing the Camshaft Gears (optional)
Removing the camshaft gears is not required to access the head bolts on this engine for head removal. This is good to note when doing a head gasket while the engine is inside the vehicle. The process is much farther reduced by not having to remove the camshafts. It is common to use camshaft TDC plates in that process.
Remove the camshaft gears. The camshafts have 6-point castings, which can be held with a wrench. Place a wrench on the camshaft to hold it in place, and loosen the camshaft gear bolts. If your chain is still on, remove and lay the chain to the side of the housing not dropping it into the lower cover.
Step 6: Index and Remove the Camshaft Caps
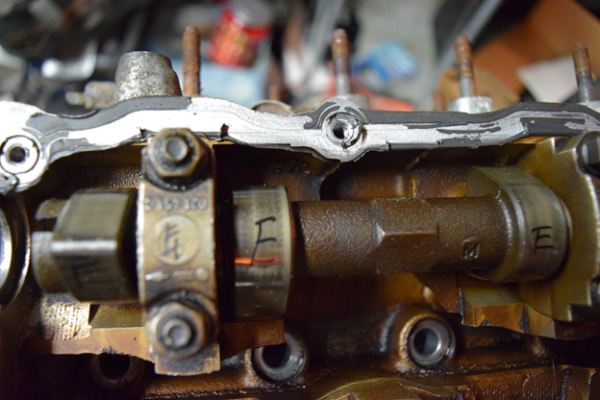
Before unbolting your camshaft caps, you will want to index your caps and camshafts. Even though the caps are numbered, it is always good to label what side of the head each camshaft and cap goes onto. In this, I am referencing exhaust side of the head and intake side of the head even though these are not necessarily an exhaust and intake camshaft.
Next, look up the torque sequence to unbolt the camshaft evenly. In this case, the camshaft caps are numbered and the removal order is: 6-2-7-1-3-5.
When removing camshaft shafts, you should always go slow and use hand tools only. Start by simply cracking each bolt in order. Then slowly loosen each bolt 1/4-1/2 turn each time, raising the camshaft evenly and slowly.
Step 7: Remove the Cylinder Head
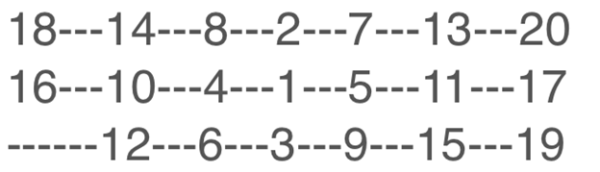
Now the head can be removed. Below is a torque sequence diagram for your bolts. Using a 12mm triple square socket, follow this torque sequence in reverse starting with the bolt labeled 20, then 19, and continuing backwards.
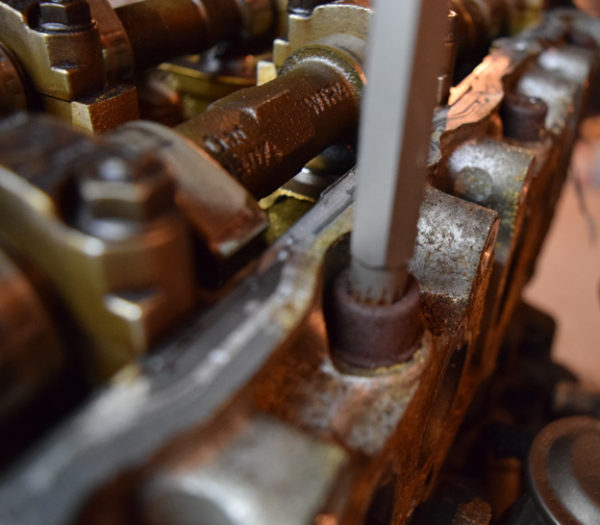
Many of the hold bolts on this particular engine are outside of the valve cover, exposed to the elements, causing rust and corrosion. You want to make sure the socket is all the way in the bolt head and all debris is cleared out.
Often times, with older engines of this type, the integral washer will stick to the head surface, making it difficult to remove the head bolt once unthreaded. In this case, you will take a flat head and a hammer, placing the flat head under the head of the head bolt and hit until the washer is loose and you are able to remove the bolt. Fully removing these bolts will make removing the head from the block much easier, especially if you are doing the work alone. These head bolts are one-time use and should be disposed of once removed.
Once all the head bolts are removed, use a dead blow and rubber mallet and hit the head on the flat sides to prevent the hammer from breaking. Apply pressure upward evenly until the head is loose.
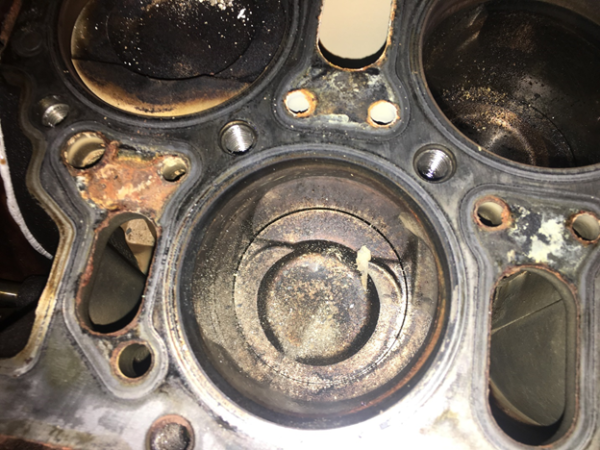
Step 8: Inspect the Cylinder Bores for Damage
Now that the head is removed we can check our cylinder bores for scoring and damage. In this case, this engine is in good shape. However, having sat for many years, it has some debris. Make sure your crank pulley is back on the engine and secured so the crank can be turned by hand or with a socket.
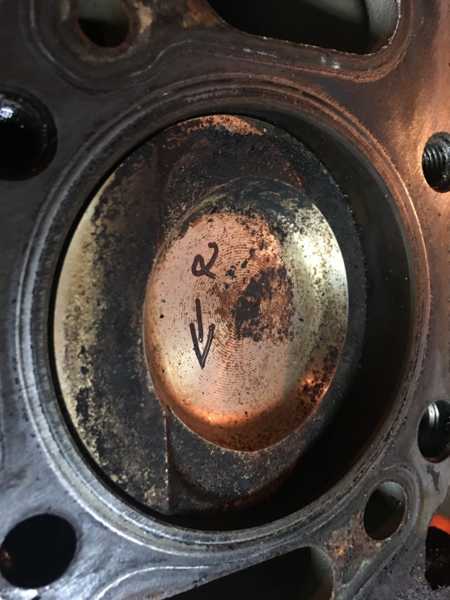
Step 9: Index the Pistons
While the engine is still upright, we want to index our piston for cylinder and orientation. To do this, take a microfiber cloth and something petroleum based, such as a little gasoline. You do not want to soak the pistons or cylinder in any type of solvent or degreaser. You want your block to stay oiled even after disassembly. So, dip a quarter sized spot of your cloth in gasoline and simply rub enough space to fit your index as pictured below. Do not worry about cleaning your pistons and removing your index. When the time comes to clean, make note of which piston you are cleaning and its orientation and simply remark it after the piston is cleaned.
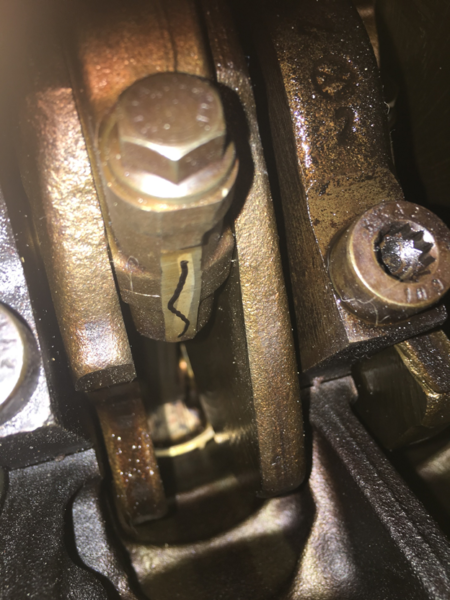
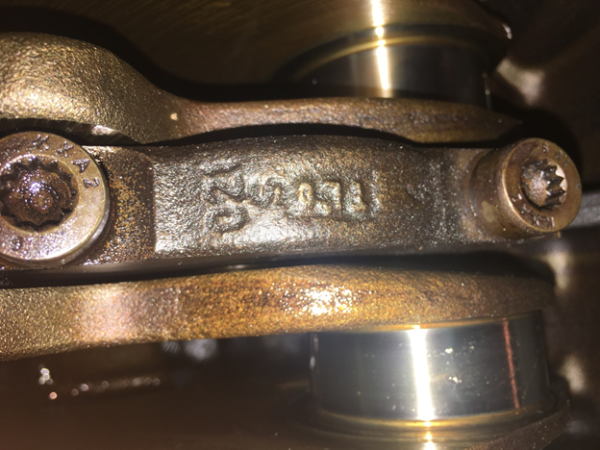
Step 10: Index the Rod Caps
Once our engine is turned over, we want to index our rod caps. Index by first cleaning the side of the rod and drawing a distinct line on that cap. Because the caps are cast metal, it can be hard to see your mark. In this case, I used a curved line so it is easier to see. It is very important that the rod caps stay with the rod they came on and in the correct direction. Mix and matching or putting a cap on backwards can end in quick bearing failure once the engine is attempted to start.
Step 11: Remove the Cylinder’s Rod Cap
Start by removing the #1 cylinder’s rod cap. Crack each rod bolt loose and then remove them. There are many different ways to remove a rod and piston from the bore. I prefer spinning the crank slowly by hand to get the piston to the top of the bore, and then using a rubber or plastic piece to push the rod and piston out of the bore with one hand, while the other hand holds the top of the piston until the rings clear the bore. When doing this process, go slow, as not to damage the cylinder wall with the rod.With a rod bolt style and not a stud, it makes it difficult to protect the cylinder wall with a conventional removal tool or something homemade. It is best to have a 2nd person at this point. This particular engine type is very long and has a 10 degree bore angle, which makes pulling a piston out without contact difficult.

Step 12: Remove the Main Caps
Once all rods are removed, use a 10mm triple square bit to remove your main caps. The main caps are all labeled clearly with direction and location from factory. Crack each bolt, moving from the outside caps inward, loosening the crank evenly and slowly – a similar method to a camshaft. Once the caps are off, remove your crank pulley again, and remove the 10mm front cap bolts and lift the crankshaft out of the engine.
Congratulations! You have torn down and indexed your VR6 engine. Stay tuned for a reassembly process and how to check tolerance and clearance in your engine with new basic rebuilt parts.
Written and work performed by Nick Iosua.
Learn How to Diagnose and Replace Parts Yourself
1A Auto has thousands of how-to videos specific to many makes and models to help you replace parts on your own. Follow the steps and tips provided by our mechanics and learn how to fix parts in no time.
Other Content
- What Are the Symptoms of a Bad Turbo?
- How to Clean an Engine Bay
- Engine Misfire When Cold? How to Decarbonize Your Engine
- Common Diesel Engine Problems
Shop Parts

This is a great post. Thank you.
Do you have the assembly as well?