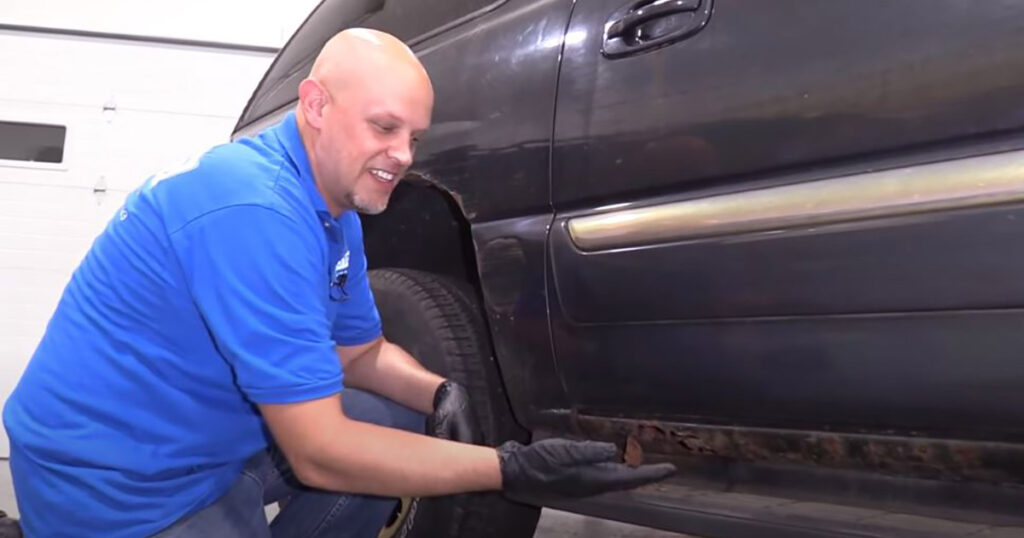
Older vehicles that drive in areas that snow can end up with rusted rocker panels over time. If it’s rusted with holes, the rocker panel needs a replacement since patching them won’t fix this problem. This article and video shows how to replace a rocker panel with step-by-step instructions.
How to Repair a Rusted Rocker Panel
Items Needed for a Rocker Panel Replacement
- Primer
- Paint
- Clear Coat
- Grinder
- Drill bits and drill
- Body Filler and Hardener
- Plastic spreader/Squeegee
- Metric sockets
- Cut off wheel
- Locking pliers
- Hammer
- Acetone cleaner
- Cloth rag
- Cardboard
- Plastic sheets
- Painter’s tape
- Welder, welding helmet, and welding apron
- Wet towel
- 36, 40, 80, 120, 220, and 1500 grit sand paper and sanding block
- Dual action sander
- Piece of wood
- Ruler
- Gloves
- Eye protector
- Mask
- Sponge
- Water
- Non-abrasive scuff pad
Rocker panel replacement steps
- Remove the Doors and Running Board
Remove the bolts from the running board and remove the supports.

Disconnect the electrical connectors, remove the hinges, and remove the door. - Remove Any Plastic Panels from the Door Jamb
Take off any plastic panels and any plastic interior trim pieces from the door jamb with a trim tool.
- Line Up the New Panel and Mark Its Position with a Marker
Put the new panel into place and mark its position with a marker. This will serve as a reference for where to cut the rusted rocker panel and rest the replacement.
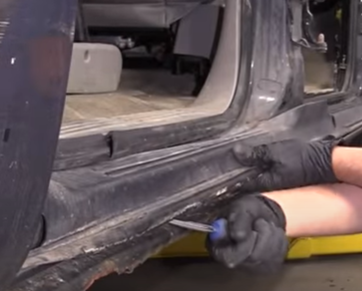
- Cut Out the Old Rocker Panel
Cut back further from the marked line. This will keep you from cutting too much of the rocker panel off so the replacement can fit.
If using a cut off wheel or a grinder, watch where the sparks are flying. You don’t want them in the carpet and catching fire.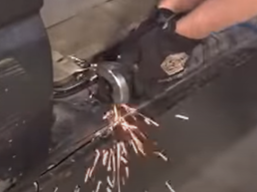
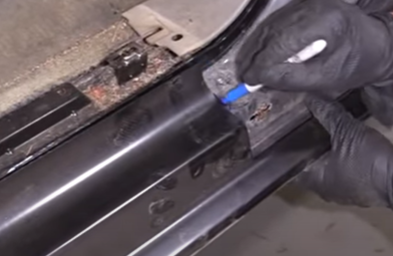
- Drill the Spot Welds with Drill Bits
There are special spot-weld drill bits that will cut around the spot weld.
If you do not have one, you can use a smaller drill bit. It’s ideal not to drill all the way through. Then loosen the panel with a hammer and chisel, and repeat this with the larger drill bit. Work your way down the top of the panel, drilling and chiseling each weld. Then bend the panel down.
Repeat this for the bottom. In the example featured in the video around 4:25, the panel is so rusted we removed the rest of it with an air chisel.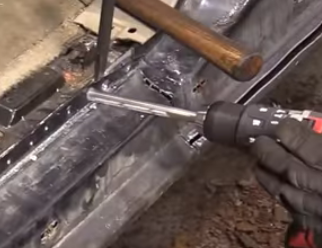
- Fit the New Panel and Continue to Cut the Old Panel to Align It
Slide the new panel into place. Trim remaining parts of the old panel so it will fit. If there rust is still on the vehicle, trim and grind it, and treat any remaining rust before welding the new panel on.
Line up the panel for an idea of how it looks. Trim remaining areas on the vehicle to line it up.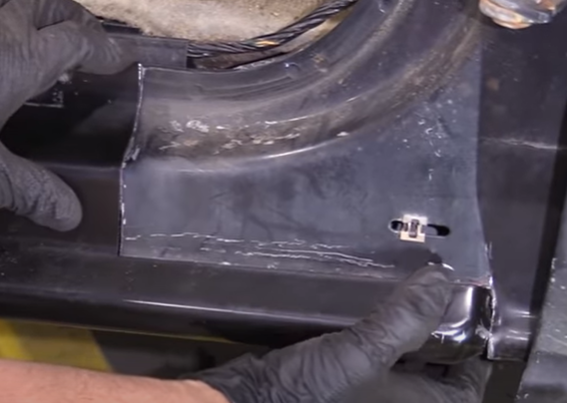
- Prep the Mating Surface
Trim any spot welds that are raised up. If rust is on the metal, sand it or use a grinder.
Wipe the mating surface metal down with acetone cleaner and a rag.
Put a couple coats of primer over any bare metal on the mating surface.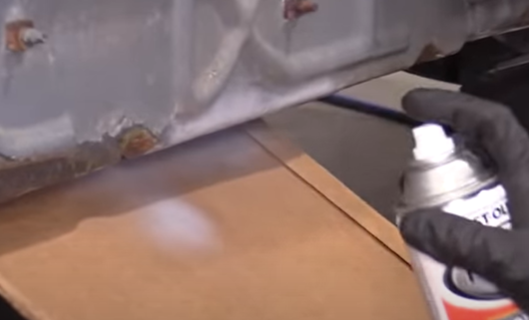
Let the primer dry. Then put a couple coats of paint over the primer. The paint doesn’t have to be same color as the vehicle, but it helps prevent rust. Use spray paint and not rubberized undercoating because rubberized undercoating is flammable. This could cause a fire when welding and you may not notice. - Prep the New Rocker Panel
Prep the new panel by grinding any areas of the new panel that will be welded. Place a piece of wood underneath the rocker panel and drill spot weld holes with a smaller drill bit in those areas. Go about an 1 ½ to 2 inches. They don’t have to be in same spot as the original spot welds.
Repeat this step with a larger drill bit, about 5/16″, unless you have a specific spot welder. We are using a flux core welder in this example.
Once this is complete, clean each hole with a grinder - Prepare the Work Area
Once ready, align the new rocker panel in place and secure it with locking pliers. Clamp up top and underneath. Protect the carpet with a damp towel and a welding apron.
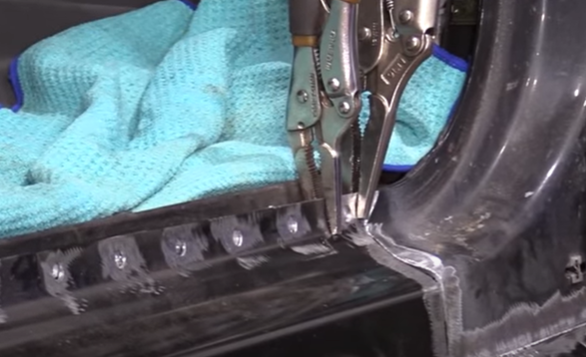
- Tack-Weld the Rocker Panel
Do tack welds on the front of the panel. Don’t put a straight bead because it could warp the metal. Do small tack welds at a time. Move the locking plier along as each tack weld is completed. Repeat this process for spot welds on the bottom. Fill in any remaining holes.
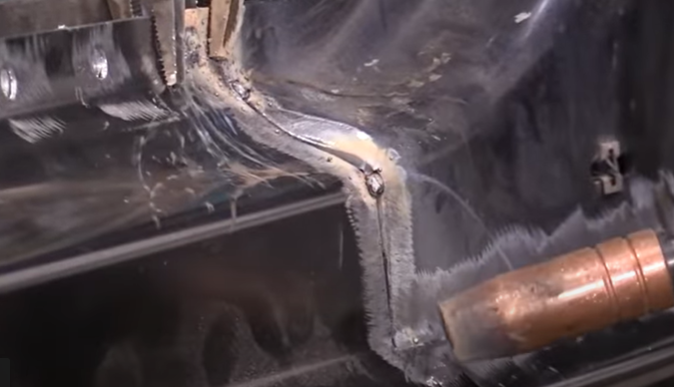
- Inspect and Grind the Welding Down
Check the welding and fill in any holes.
Lightly grind the welding down and the spot welds. Don’t grind down too much. Tap the welds with a hammer after grinding. Grind further and keep alternating until the welding is smoother and more flush and even. Weld any major gaps.
To test the welding, you can slide a ruler along the welds and check if the ruler touches any of the welding. If the welds touch the ruler, hammer or grind them down.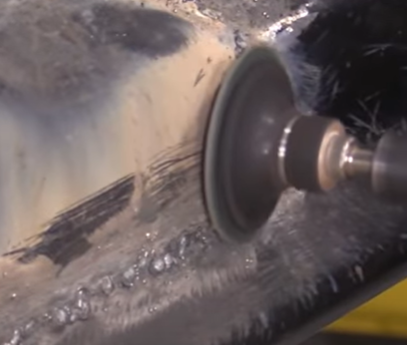
- Prepare the Body Filler
Take a piece of cardboard and plastic and tape a plastic sheet to the cardboard to create a stable and transportable surface.
Use a body filler with fiber glass. Mix the body filler. Don’t mix too much and make about a circle with a 3” diameter. Between a quarter and half an inch thick. Apply hardener to the mix. Open the cap and squeeze the air out. Replace cap and mix the hardener up, squeezing it and shaking it. Squeeze a line across the circle. Bring it over to the vehicle before you start mixing. It will harden quickly once mixed. Try not to get air bubbles in it.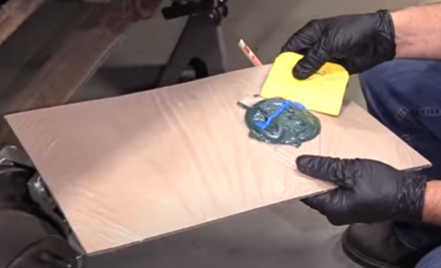
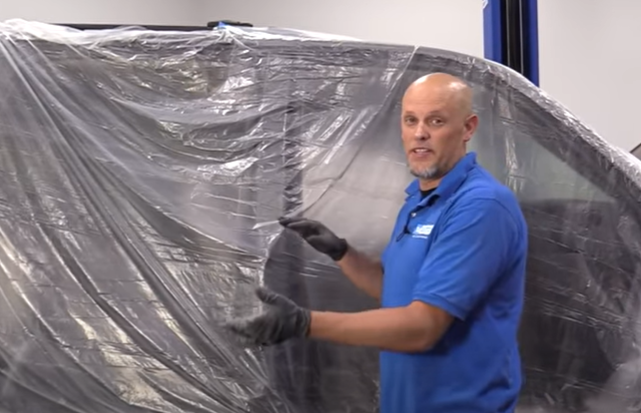
- Put a Plastic Sheet Over the Doors Before Applying and Sanding the Body Filler
Dust gets everywhere, so put plastic over the doors to prevent dust from getting into the car when sanding.
- Apply Body Filler to the Welds
Apply body filler to the welds and push it into the welds. A base coat will strengthen and seal the metal.

- Sand the Body Filler Right After It Is Applied
Don’t wait too long before sanding the body filler because it can turn hard fast and will be harder to sand. Use 36 or 40 grit sandpaper. If the body filler feels tacky, you may have to wait a little until it is solid and can be sanded.
Use a sanding block. You can get finger marks in the compound, it wont be as smooth, and this step will take longer.
Sand up and down, back and forth, and in cross motions. Then switch to 80 grit paper to get any lines out.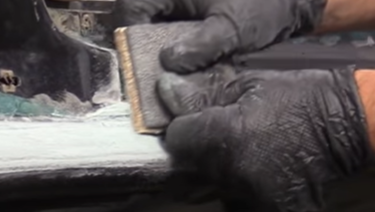
- Apply a Different Type of Body Filler and Sand It
Once the first compound that had body filler with fiberglass has the right shape, use another type of body filler that will fill in the imperfections by applying a thin coat. If starts to get difficult to spread and harden, you may have to mix up more.
When done, put the squeegee/plastic spreader against the cardboard and let it harden. It is easier to remove once hardened. Then once its ready, sand it with 180 grit paper to make a smooth finish. - Sand the Body Filler with a Dual Action Sander and 220 Grit Paper
Then sand the filler with a dual action sander with 220 grit sandpaper. Feather the filler in for a smoother finish.

Clean and wipe the area with a sponge and water. - Scuff Up the Paint with a Non-Abrasive Scuff Pad
With a non-abrasive scuff pad, scuff up areas of paint that primer and paint will be applied to.
- Apply Primer
Follow the directions listed on the can. Give the area a light coat. You might need to put on a couple coats.
To prevent drips, spray in a line across, and then spray in a line in the other direction, and alternate back and forth until the area is covered. Spray in a downwards direction.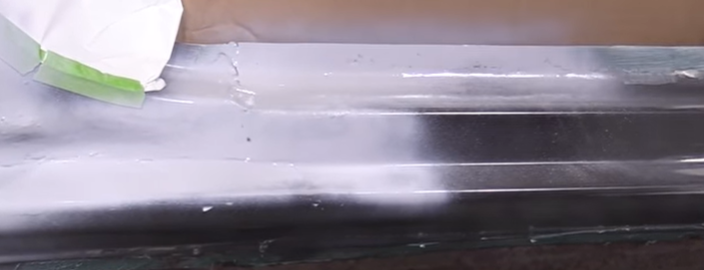
- Fix Any Rigid Paint Lines
To fix a rigid paint line and any paint scatter above the primer, take 1500 grit wet sandpaper and a sponge, and wet-sand the rough areas until it feels smooth.
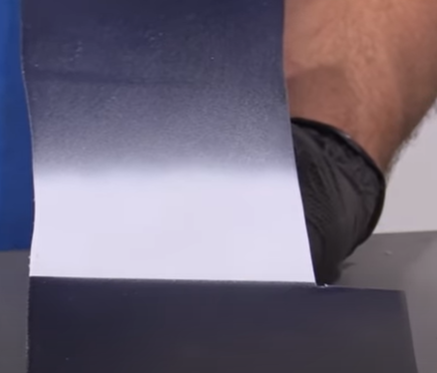
- Apply Paint and a Clear Coat
Once the primer is dry, spray color-matching paint over the primer. Shine it up with clear coat, which will also protect it.
- Reinstall the Running Board, Trim, and Doors
If the new panel doesn’t have enough holes to attach the trim, you can drill holes into it, or remove the pins from the trim, clean the inside, and apply double-sided tape. Press the trim firmly into place.

DIY Repairs: Learn to Fix Your Own Car
Learn how to diagnose and replace parts on your car. 1A Auto has thousands of how-to videos with instructions from professionals for tons of makes and models.
More Content with Professional Tips
- How to Prevent Rust on Your Car
- How to Remove Rust from a Car Before It Becomes a Hole
- Is Your Rusted Car Frame Safe to Work Under?
- Daytime Running Lights Not Working?
- Power Seat Won’t Move Up and Down? How to Fix an Electric Car Seat
- Most Common 1999-2007 Chevy Silverado 2500 HD Problems
Shop Parts and Tools
- Brakes & Wheel Bearing
- Steering & Suspension
- Headlights & Lighting
- Exterior, Body Parts & Mirrors
- Tools & Accessories
