If during a repair you happen to damage a wheel stud or notice one is damaged, there are a few ways you can fix it. Whether the wheel stud has damaged threads or if it’s loose and bent, this guide and video explains how to repair the studs’ threads and how to complete a wheel stud replacement yourself.
How to Fix Damaged Wheel Stud Threads and Replace a Broken Wheel Stud
For damaged and stripped lug nut studs, you can file the threads down until they can grip the lug nut again.
For pushed in, loose, broken, or bent lug nut studs, you can remove and replace them.
How to Fix Stripped Lug Nut Stud Threads
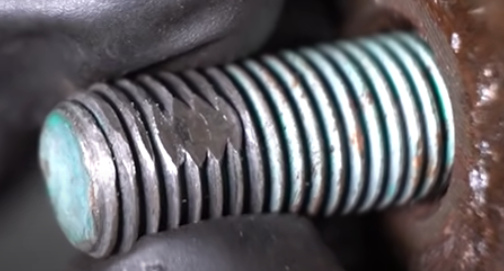
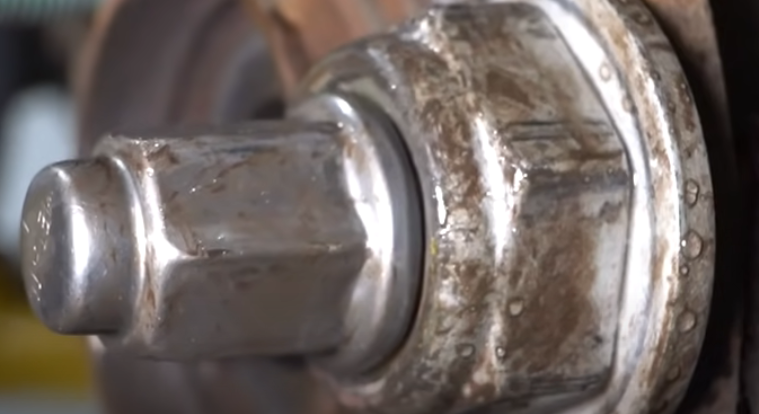
You may have been trying to loosen the rotor and nicked a lug nut stud with a hammer. This can cause minor damage to the threads. If the wheel stud isn’t bent, you may be able to repair the studs with a file.
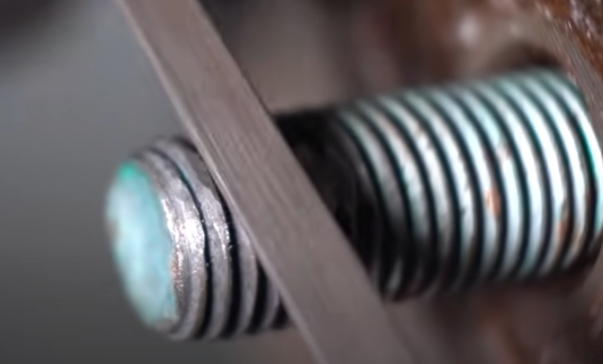
File the stripped areas until they are removed and you can see the threads again.
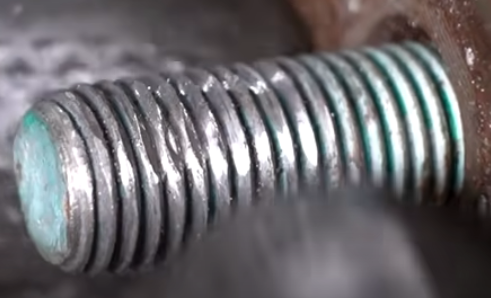
Then thread a lug nut on and test how well the threads work.
If the lug nut can’t twist on past the damaged wheel stud threads, remove the lug nut and continue to file until the threads are visible and can work.
How to Replace a Loosened, Bent, or Damaged Lug Nut Stud
Wheel Stud Replacement Steps
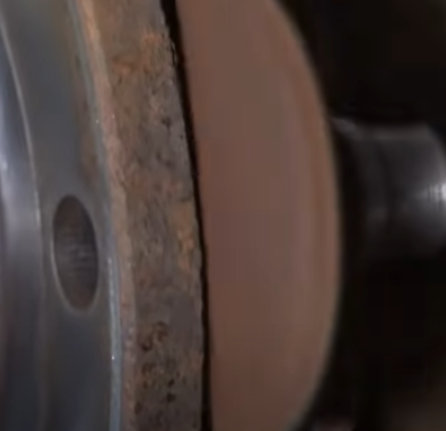
- Remove the Brake Rotor
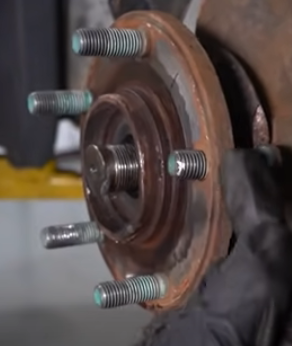
You’ll have to remove the rotor to replace a bent or loosened lug nut stud—especially if it has broke off. - Remove the Damaged Wheel Stud and Inspect the Splines
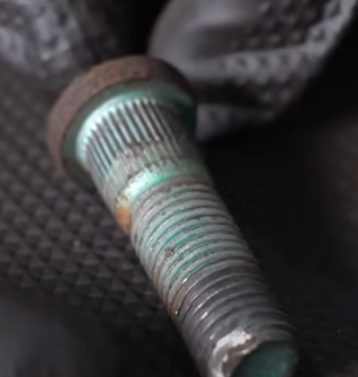
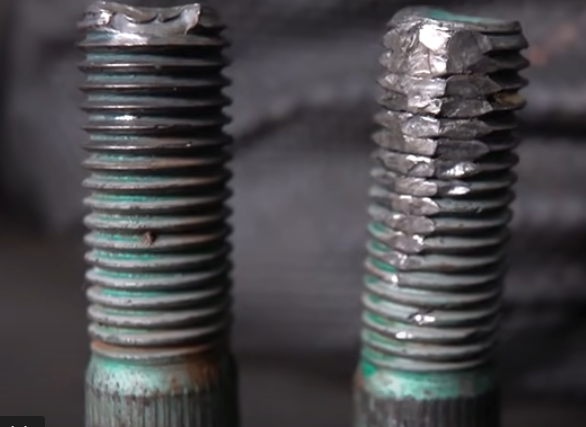
Look at the lug nut stud and see if it’s reusable. Check the threads for unfixable damage. - See If the Wheel Stud Is Bent
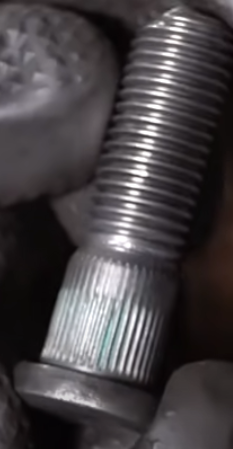
Check the stud for straightness. You can’t reuse a bent wheel stud. You can roll it and see if it rolls smoothly instead of a bent one that may not roll far. - Clean the Wheel Nut Lug Stud
Use a wire wheel to clean up the stud, and then double-check how well the lug nut twists on.
- Clean the Front and Back of the Wheel Hub
Remove any debris from the front and the back of the wheel hub with a die grinder and wire brush. - Install the Wheel Lug Nut Stud with Red Thread Locker, a Spacer, and a Socket and Impact Wrench
Place red thread locker at the top of the lug nut stud splines that will sit in the wheel hub. Tighten the stud with a spacer and socket. Use a spacer with a washer or apply grease to the hub so the spacer can secure. Tighten the wheel stud until the back of it lays against the hub, and install it as straight as possible.

Want to Do More than a Wheel Stud Replacement? Fix Your Car with Our How-to Videos
Learn DIY tips and tricks to diagnose and fix parts on your car. We have thousands of videos for many makes and models with tips and steps from expert mechanics to help you fix your car.
Read More Expert Tips
- Wheel Bearings & Wheel Hubs 101: What They Are And How They Fail
- What Are the Different Types of Side View Mirrors?
- How to Put on a Spare Tire Correctly
- Rocker Panel Replacement: How to Repair a Rusted Rocker Panel
Shop Parts and Tools
Those wheel studs look like they were pummeled by a hammer. Great tip with rolling the studs to see how far they’ll roll. Also, did you use thread files all the way through with the wheel stud? How long did it take to fix the threads?