We left off part four of the Chevy Impala project with me parking the car in the yard, and taking a year or two off. Sad I know… However, during that little break, I cleared my mind, and finally built myself a garage to work in. On March 15th (read: cold, snow on the ground), I started building the garage from my own plans with a borrowed nail gun. 7 months later, I gathered some friends, and pushed my Impala into its new home. By that time, it was beginning to get colder, and even though I was indoors, the non-insulated garage was too chilly to work inside. 5 more months pass, and spring 2011 has finally arrived.
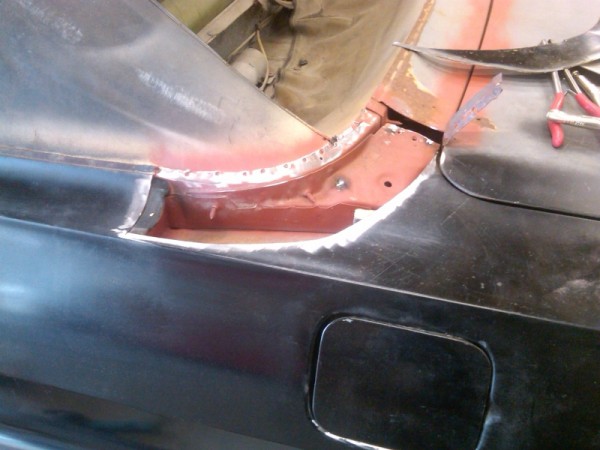
We left off with the quarter panel being fitted, but it didn’t really sit on there quite right. It was also intended for a hardtop, so I had to slice the top of it off. This update is how I went about fitting the convertible metal to the hardtop quarter. I began with a hole where some old metal belonged.
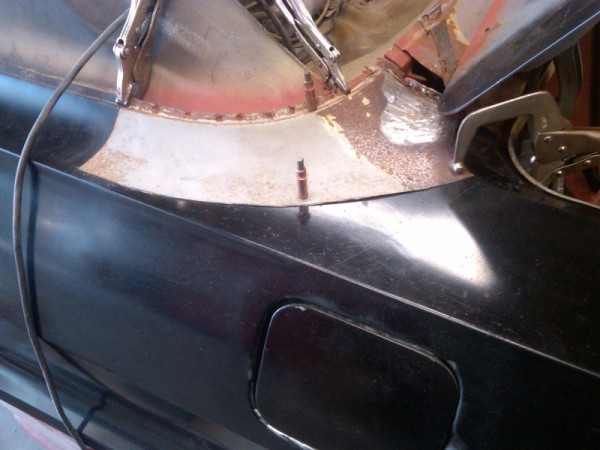
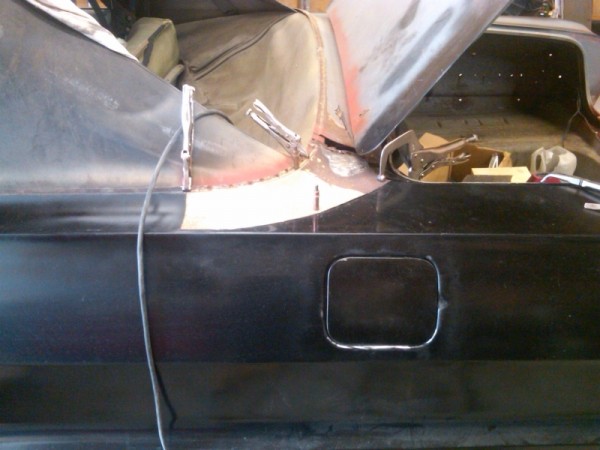
Then I took the old convertible top sheetmetal and fit it to the new quarter. It needed some trimming but with Vise Grips and Cleco’s I got it to sit right.
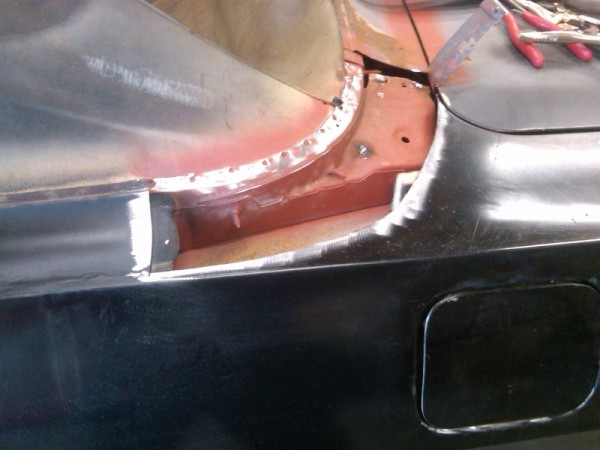
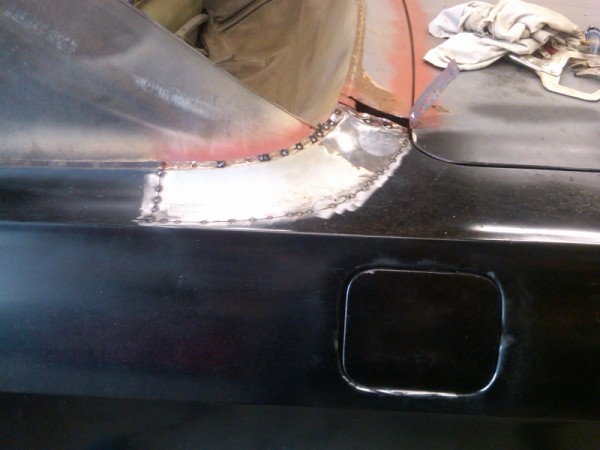
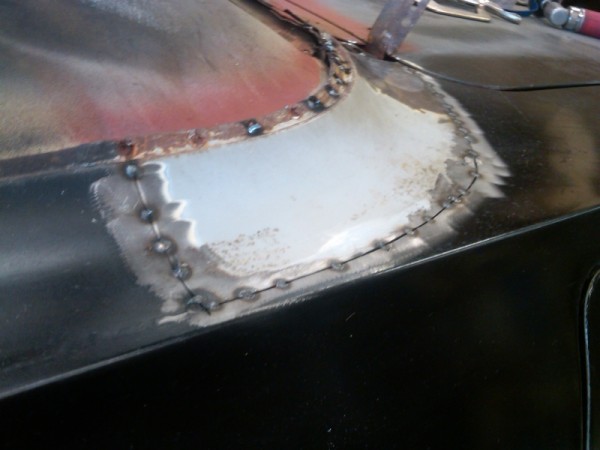
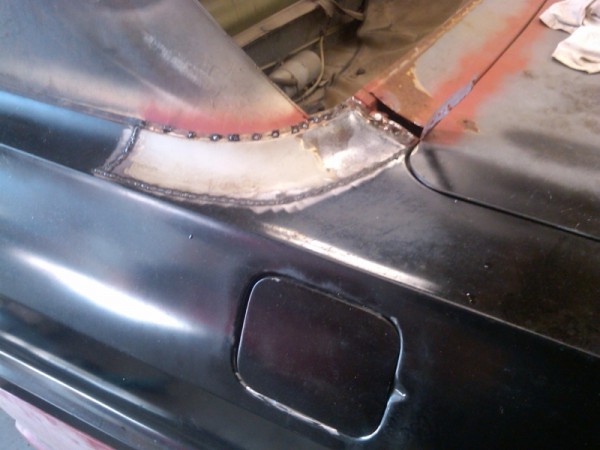
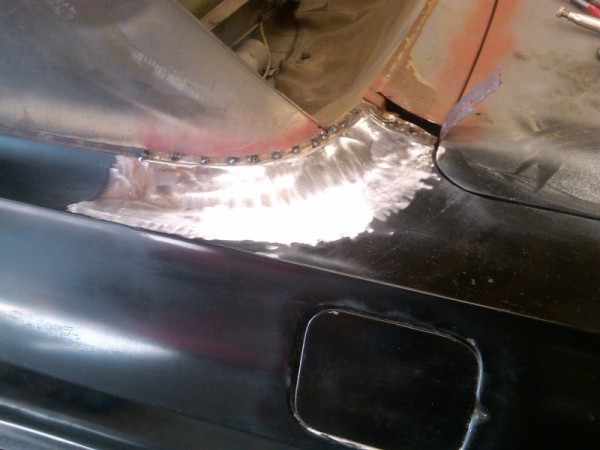
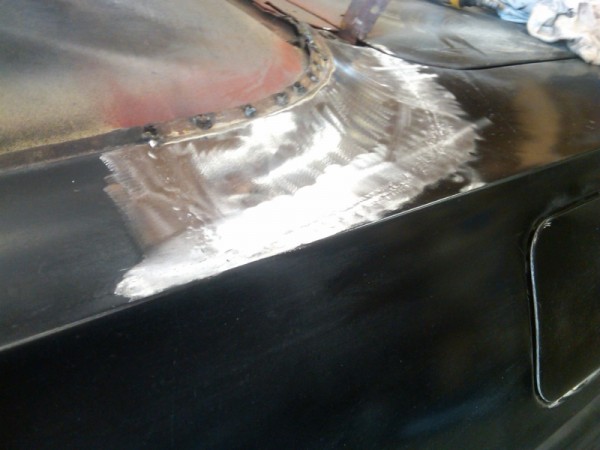
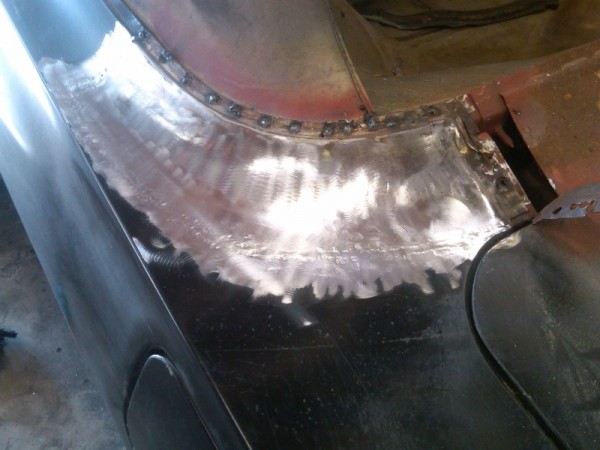
I then trimmed the quarter to match up so that I could butt weld it to my old convertible piece. Once it fit properly, I began tack welding it in place. I took it verrrrry slow to prevent warping.
I continued spot welding around the edge until the weld was completed. It took forever.
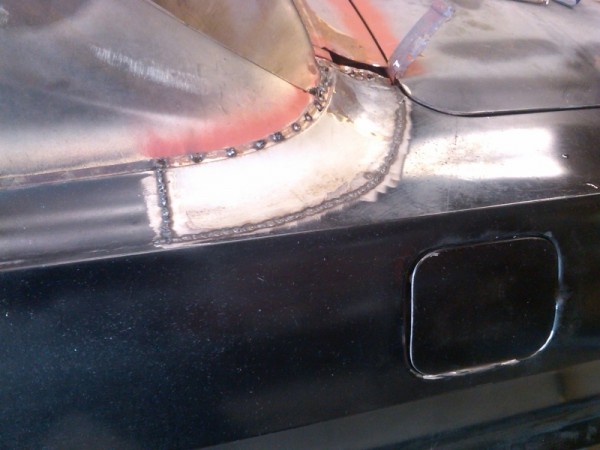
Then I ground down the welds. I started by removing the high spots with a cut off wheel. Being careful was key, because it is easy to go off course and hack a hole in your nice new quarter. Then I smoothed the welds with some Roloc discs.
I left off with the metal at about 85% nice in my opinion. Eventually I am going to smooth it a little better and use as little filler as humanly possible.
More to come…
In case you missed it:
1964 Impala Convertible Project Part 1
1964 Impala Convertible Project Part 4
1964 Impala Convertible Project Part 6

…but this would make a great time to convert to a lop-top!
Lop-top = Bubba convertible
Yay!! I’m so rooting for this car now, lol
I don’t know what you used to weld it with but I am an old heliarc welder of about 14 years, can no longer weld because of the pace maker but would have loved to have welded that for you just to say I had a part in it . You pass the test of doing it right , that means more today then it did years ago . I will be looking for the finished product, I bet it looks better then when new .
Wow, thanks Ken! I really appreciate that! I will be sure to continue posting the progress as it plays out.
Take it with a grain of salt I am by no means an expert on redoing old cars I just take note of your effort to make this a one of a kind restoration. I have a cousin who used to restore 56 Chevies and he was the most meticulous person when it came to restoring them . the bottom of the car looked as good as the hood paint when he finished one. He did some others also, I remember a 36 Packard he did and I know it did not look that good when new. two Edsels but he did not keep them, shame, he could have had a show all his own . He did a 67 Caprice that his dad bought new and he found it ,a teacher had bought it and it was a bucket of rust . it was like magic but he restored it to prime condition and he went through all the steps to insure no future rust.One of the very best body men in Tenn. You seem to have that same spark that drove Nick.
http://1964chevyrestoration.shutterfly.com/
Jeremy, love how you cut and make those patches.
Here are some shots of our 64 project.
go full screen and read the comments on the bottom.
great job really, don’t lose hope, (nice garage too!)
steve
Steve, that is truly inspirational! Looking back, I wish I did the same thing with the rust free hardtop shell, it would have been faaaaar easier. Live and learn I guess. 😉 I hope you don’t mind, but I may be hitting you with some questions from now on. The first one happens to be right now! Did you end up putting rocker panel “supports” under the hardtop’s rockers? The convertibles had the thick metal u-shaped support that was welded to the bottom of the rocker and ran the length of the car. I can get a picture of mine if necessary. Any thoughts?
I know what your asking about the supports, there was alot of rust in ours, we had the body work done at a body shop, and I’m going to guess NO supports were replaced. this was my bosses car,
I did all the mechanical, & re-assembly(top to bottom),
body and paint were someone else’s headache.
the hardest part of this job, was when they had to cut in the top
assembly from the old car. they did a good job on it.
the boss got tired of the car and sold it 2 years later.
I was not happy…
Wow, that is a huge undertaking to get tired of after just 2 years. How sad. 🙁
I am really enjoying these features on your Impala restoration. To me it is novel to read about the metal work that goes into the project, which most resto-stories seem to ignore in favor of a bolt-on “brag list”. Glad to see you are doing it right instead of just covering up the cancer with bondo. I am looking forward to seeing the next installment.