Fill Muffler With Fuel, Ignite It, and Replace.

muffler_2

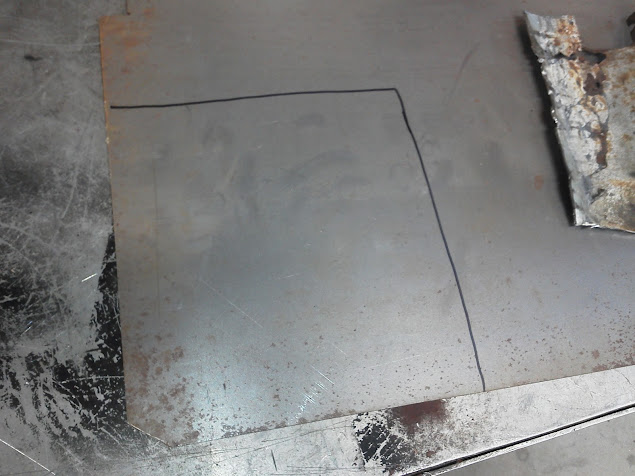
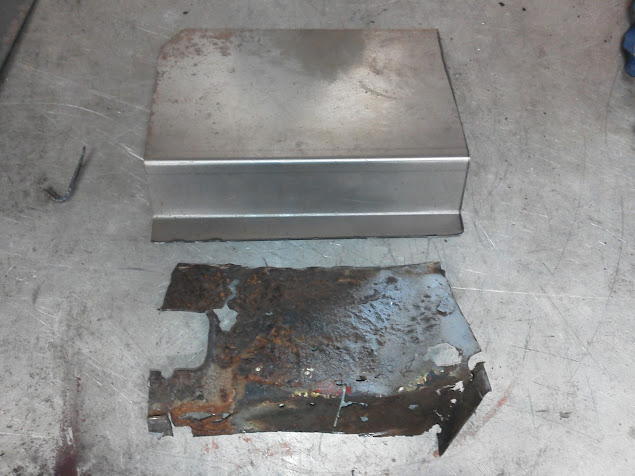
You may remember my 1964 Chevy Impala project from a while ago. Unfortunately, it hasn’t changed a whole lot in the past several months because of “life” combined with horrible New England winter.  Luckily, now that it is above freezing outside sometimes, I’m starting to mess around with it again. Sweet right? Yea I think so too.  Most recently, I decided to tackle a small project that has been bothering me for about 10 years. I call it “The stupid exploded muffler.”

This muffler story begins about 13-14 years ago when I reinstalled the straight 6 back into the rolling 64 Impala convertible chassis that I had just rebuilt. As you can imagine, I needed a new exhaust system to attach to my fancy painted engine (it was fancy at the time – now it looks terrible again).  So, I went to my local auto part store and spent about $120 on a whole new exhaust system, including the muffler. Since then, the car has probably traveled … oh… maybe 3 total miles under its own power. Every inch of that was with a crappy carburetor, idling around my driveway. AKA – worst idea ever.  Letting a car sit is the meanest thing that you can do to it, and this car really did some serious sit time. It’s just not good for the car, or any part attached to a car, especially the carburetor.

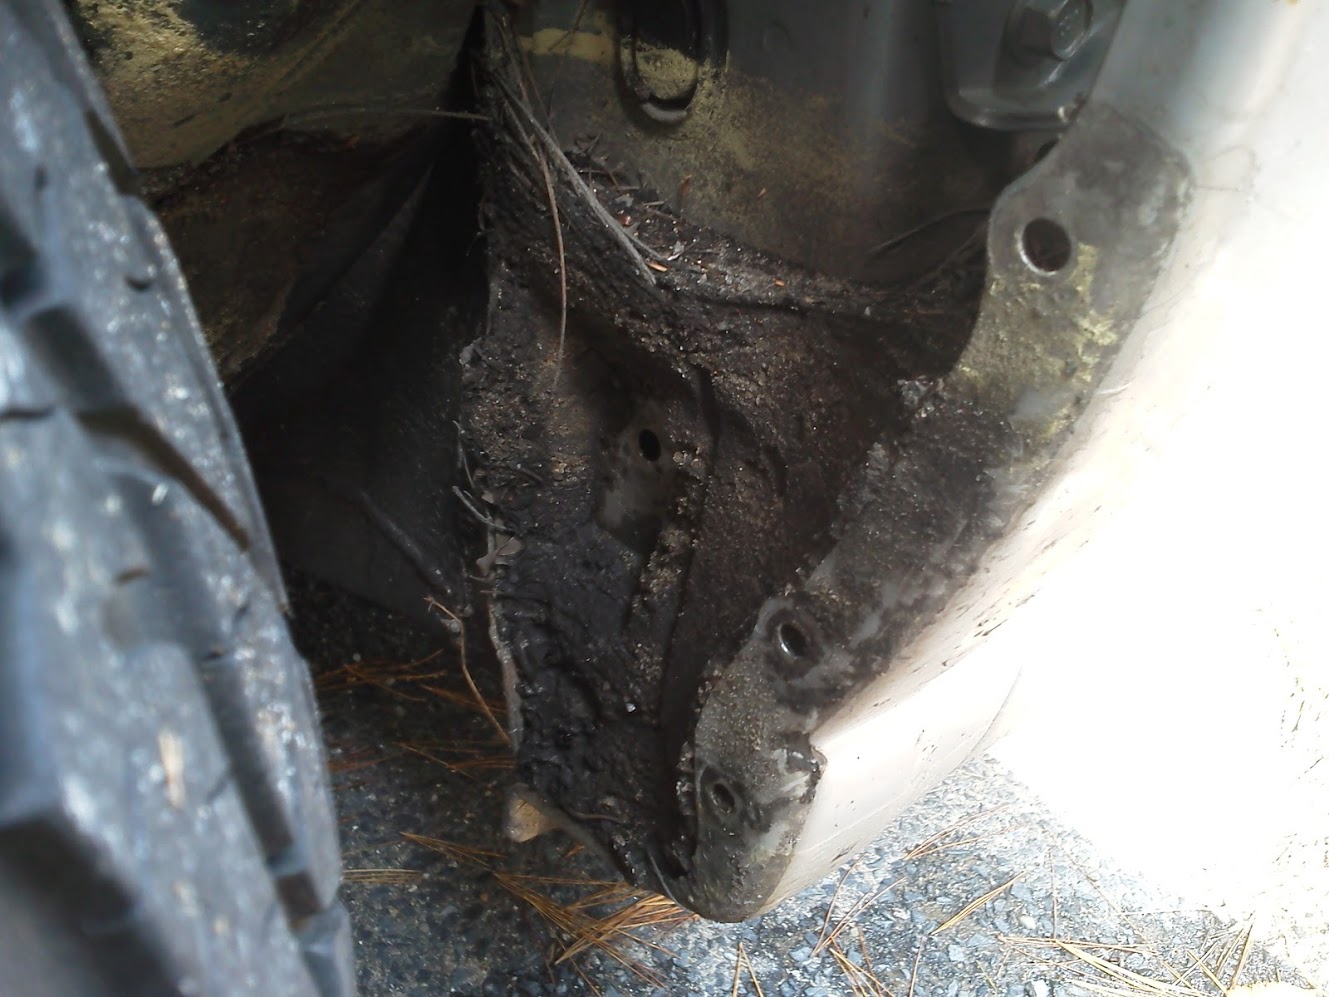
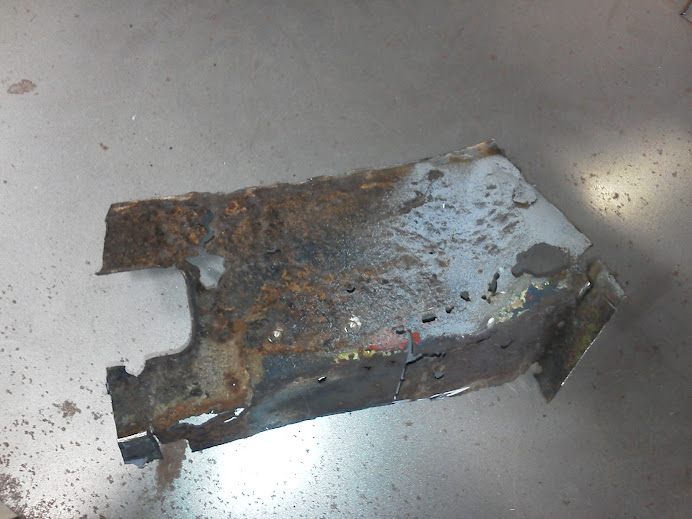
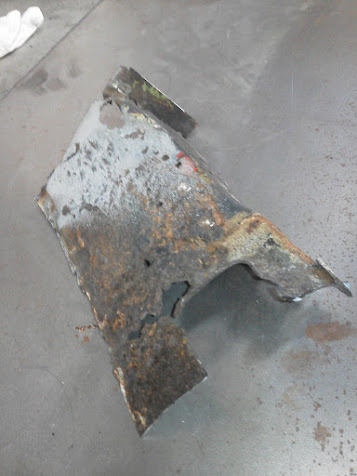
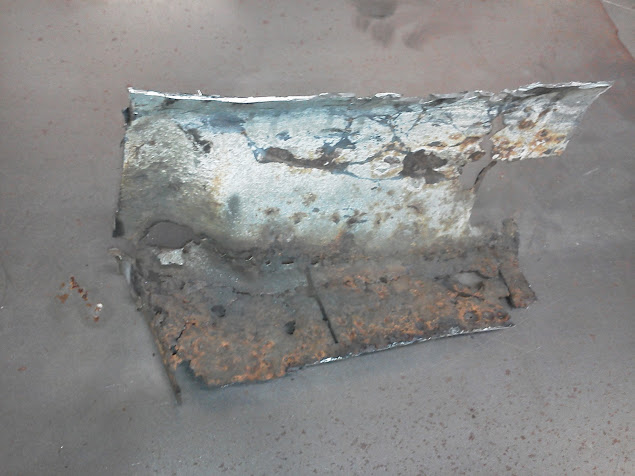
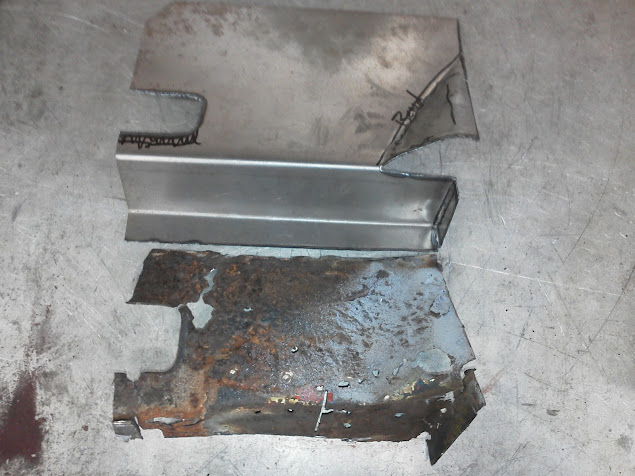
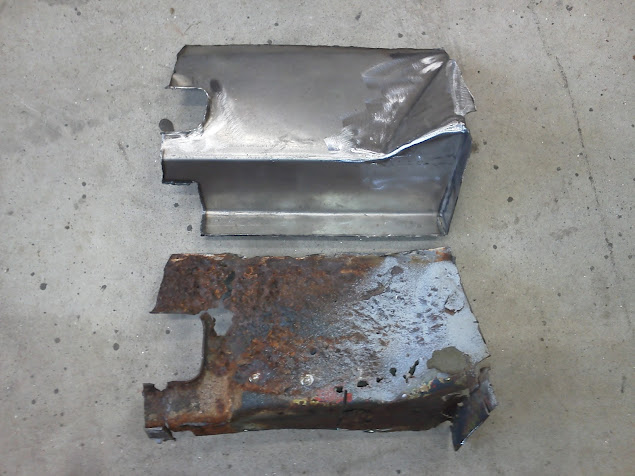
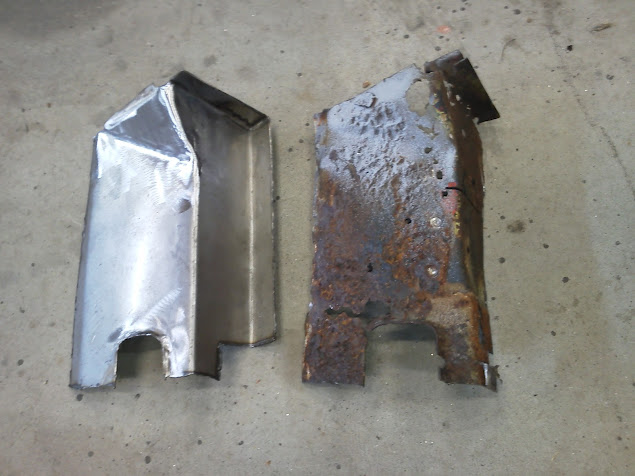
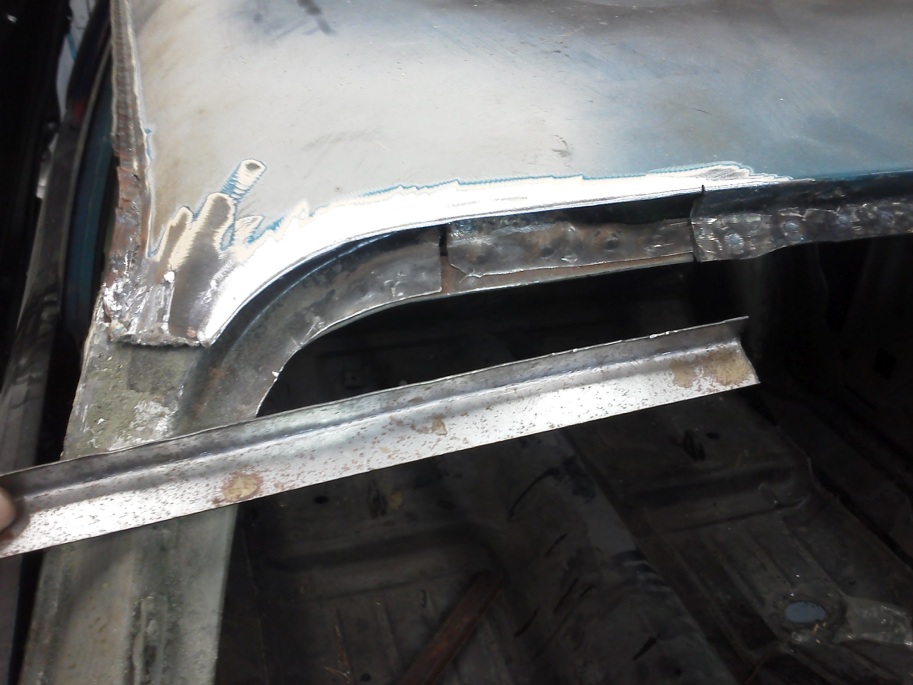
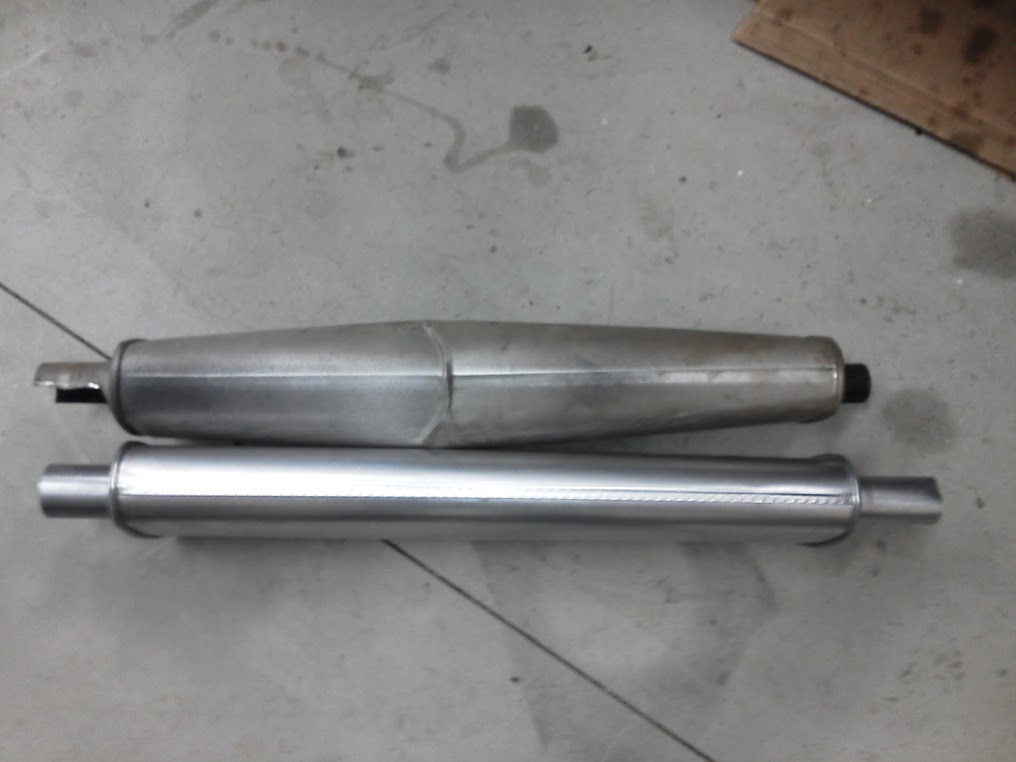
As you can tell from the pictures,  at some point raw fuel built up in the muffler, and it ignited with the force of one thousand squirrels. The muffler ballooned enough to rattle on the floor pan with every rotation of the six’s crankshaft. That noise will drive a person crazy.  The muffler explosion also tore the muffler open slightly in 1 area, but I welded it back up years ago just to keep it sealed.  Now, many years later, I have rebuilt the carburetor, and it was finally time to replace the stupid exploded muffler.

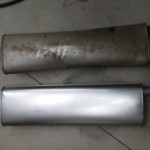
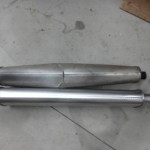
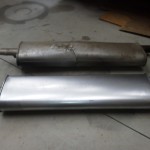
Notice the wrinkles, the thickness difference, and awesomeness that is my stupid exploded muffler.

Aftermarket vs OEM Subaru Timing Belt Pulleys


In the interest of shining a light on the OEM vs aftermarket truth, I wanted to show off a little something I noticed during my travels. Not too long ago,  I replaced my timing belt, pulleys, hydraulic tensioner, and water pump on my 2005 Subaru Impreza RS 2.5 SOHC (booo no turbo, I know, I know, it was a good deal). As you can imagine, I got part number GAEEK00038 from 1A Auto (Hey, I can throw a subtle ad in here if I want, amirite?)  Anyway, the timing belt kit that I purchased was made by Gates, who is a very well known, and reputable brand in the auto part world. When I opened the box, it was a bit of an  “Ah Ha!” moment. Mixed in with the Gates brand water pump and belt, were OEM pulleys! They had all the same markings as the OEM ones that I pulled off of my Subaru. Yes, 100% totally identical in every way. Cool right? (New ones on the left, old ones on the right)

timing parts_1

timing parts_3

timing parts_4

Much like I had seen in the past, even though it is considered an “aftermarket” part, it may actually be OEM. Now, obviously this is not the case every time. In fact, I would say that it is the minority. But, hey, it happens more than you might think.  Beautiful “aftermarket” …ehem… OEM… parts at a bargain price!

Hate Rust? I Will Show You One Way To Slow It Down.

As you may have heard, in New England, we have rusty cars. Lots of them. It’s disgusting. The best that we can hope for is that our fenders and suspension don’t fly off unexpectedly on the highway. Because that kind of stuff actually happens around here. Quite regularly, I see control arms rotted in half, entire mufflers in the middle of the road, and struts where the lower coil mount snaps off and allows the coil to stab the tire.

Being a car-guy, I like my cars,  so one of the actions that I enjoy doing every few months is cleaning debris out of my front fenders. It’s strange, I know, but I do it regularly with hopes that it will make some kind of difference in the life of the vehicle. That being said, I never keep a car long enough to find out. It’s a blessing and a curse I guess.

So anywho… I usually start by staring at the lower section of my fender to figure out what needs to happen for me to get the gross stuff out.

subaru_fender_2

On my 2005 Subaru Impreza, I began this process by removing the black plastic inner fender. Behind it is where I found about 3 lbs of dirt, mud, sticks, bugs and pine needles… Notice how lovely the area looks with that pollen covered water line. Nice.

subaru_fender_3

Read More

Spark Plugs: The Old Vs. The New

Last week, I decided to replace the ol’ spark plugs on my 2005 Subaru Impreza RS. While the car was running perfectly fine, I figured that they were due since the car had 105K miles on it. Luckily for me, yanking the spark plugs out of a non-turbo Subaru Impreza is completely drama free. Within a few minutes, all of the old ones were out and they clearly looked worn out. Their gaps were twice what the factory called for, and then some. It’s really amazing that the Subie wasn’t running rougher.

Before long the new spark plugs were tossed back in, and I was pleasantly surprised to find a noticeable difference in engine smoothness at idle, and while accelerating. I hadn’t realized that it wasn’t smooth before, until I felt the new smooth. Sure enough, the new smooth is considerably better. I’m hoping that this will gets me the other mile per gallon that I need to hit a consistent 30…  We’ll see!

The End

1972 Nova Project: Repairing The Rocker Panel

The roof of the 1972 Nova project is finally wrapping up, so I decided to tackle the rocker panel next.  It was rough.  Like… really rough.  The outer rocker panel was missing, along with the lower fender mount and the inner bracing that keeps everything structurally sound. Repairing it was not the easiest thing that I have ever done.

The first step was to cut away all of the rotted metal until you find a solid base to work with.  Then, since nobody makes replacement metal for this area, I had to fabricate my own.  I started with the inner bracing since that was the deepest part.  This piece was more complicated than I expected, because it is actually the lowest portion of the inner kick panel.  (Think about that for a moment.)  That interior kick panel metal goes down through the floor pan, and into the rocker where all of these different pieces meet up in harmony.  To get the rusty section out, I had to cut a section out of the newly replaced interior floor pan, along with all the metal on the outside.  Once I had it out, I grabbed some flat metal and started fabricating the piece that I needed.    Since nobody likes reading, here is the story in the form of pictures.  Enjoy, and leave some comments so that I know somebody is here besides me.

1972 Nova Project: Repairing The New Roof… Still.

Two weeks ago, I repaired the rear section of the “new” roof on the 1972 Nova project. This past weekend, I focused on the front passenger A-pillar, because like the rear, it was also trash. I began by cutting the rotted metal out with the cut off wheel.  I then bent a piece of steel at a 90 degree angle with a hammer & vice.  From there, I shrank the metal, which caused it to beautifully curve.  Then it was just a matter of MIG welding it to the existing roof and a-pillar, and grinding it smooth.  Once I am totally happy with it, I’ll soak the inside of it with some type of coating to prevent rust. After all, that’s what got us here in the first place.

Also – If you are enjoying this build, hating this build, have a question, or want to just shoot the breeze with us, leave a comment below. Without comments, we never know if this sort of topic is loved or hated!

Thanks,

-Jeremy