The Chevrolet Traverse is an SUV that is similar to the GMC Acadia and Buick Enclave, and two generations currently exist. This post and video reviews the top Chevy Traverse problems that owners have run into with the 1st generation, years 2009 to 2017.

Top 5 Issues with the 1st Generation Chevy Traverse
1. Transmission Problems
Symptoms of Transmission Problems
- Shiftability issues, sometimes in 3rd gear or 5th gear
- Check engine light for transmission-related codes
Causes of Transmission Problems
The internals of the transmission have several clutch plates. If the 3-5-R plate goes bad, problems can arise.
How to Fix Transmission Problems on the 1st Gen Chevy Traverse
Check the condition of the transmission fluid. If it’s dark or burnt, that usually means the maintenance interval for the transmission has been surpassed.
If the transmission fluid looks clean, there is probably a broken clutch plate, which requires repairing the transmission.
2. EVAP Purge Valve Failure
Symptoms of EVAP Purge Valve Failure
- Check engine light for EVAP system, likely code P0496
- Runability issues like stumbling engine
- Car cranks but won’t start after filling the gas tank
Causes of EVAP Purge Valve Failure
The purge valve is an electronic valve that is supposed to open and allow vacuum from the air intake system to draw fuel vapor from the charcoal canister and burn it inside of the engine’s combustion chamber. If the valve remains stuck in the open position, vacuum will constantly be drawing fuel vapor into the engine. A check engine light may read for code P0496, which will probably read as “flow during non-purge in system,” which means the purge valve is stuck open.
How to Fix EVAP Purge Valve Failure
Inspect the gas cap first if there is an EVAP code. Check the gas cap gasket for cracking or damage or dirt and debris. Check it’s ability to ratchet and replace the gas cap if needed.
Remove the engine cover and inspect the purge valve. The purge valve should be closed.
Steps for how to check the purge valve
- Disconnect the Purge Valve
Disconnect the EVAP line and the electrical connector
- Have the Oil Cap on
Make sure the oil cap is on
- Start the Vehicle
Start the vehicle
- Place a Piece of Paper at the end of the Purge Valve and Feel for Vacuum
Feel at the disconnected end of the purge valve for vacuum. Place a piece of paper over it to see if it sticks. If the paper sticks, the purge valve is stuck open and needs to be replaced
- If Needed, Replace the Purge Valve
To replace it, disconnect the line and remove the bolt from the purge valve
3. Front Strut Failure
Symptoms of Front Strut Failure
- Loose steering wheel
- Clunking noise over bumps
Causes of Front Strut Failure
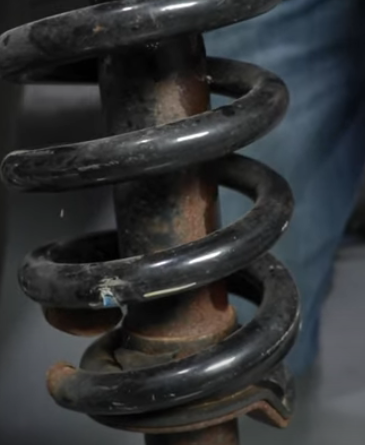
The strut is designed to compress to absorb the impact from the wheel hitting the road and to keep it on the road. The top bushing that connects the top of the strut to the body is loose, it can create a clunking noise. If oil is leaking along the strut, the strut is blown. The coil spring may also break, which means the strut needs to be replaced and can create a clunking noise.
How to Fix Front Strut Failure
The strut can be compressed, assembled, and replaced with individual parts or it can be replaced as an assembly. If one strut is replaced, we recommend replacing the one on the opposite side and to have a professional alignment done after.
4. Master Window Switch Failure
Symptoms of Master Window Switch Failure
- The master window switch might not power a window or multiple windows
Causes of Master Window Switch Failure
The master window switch is located on the driver’s door because it controls all the windows in the car. If one of the windows is not working, it doesn’t mean the master switch is the issue. If the master switch is not able to roll a window down, there may be a problem with the window itself. Sometimes moisture can collect inside if, for example, a window is left cracked open.
How to Fix Master Window Switch Failure
Try the switch on the problematic window. If the switch works but the master switch does not roll the window down, the master window switch needs to be replaced. Check the master window switch for corrosion and replace it if there are signs, which can manifest as discoloration on the electrical switch terminals.
If water collects around the switch, remove water with a cloth and remove moisture from the switch with compressed air or a bag of rice. If the switch is faulty, replace it.
5. Liftgate Latch Support Failure
Symptoms of Liftgate Latch Support Failure
- Oil leaking from the liftgate latch arms
- Open tailgate lowers unexpectantly
Causes of Liftgate Latch Support Failure
The latch arms are pressurized. If they lose pressure, gas and oil may seep out of them.
How to Fix Liftgate Latch Support Failure
Replace the latch arms. We recommend replacing both at the same time.
Fix Common 1st Gen Chevy Traverse Problems Yourself
Learn how to fix common problems on the 2009 to 2017 Chevy Traverse and many other makes and models with 1A Auto’s how-to videos. Our instructional videos can help you save money by guiding you with your own repairs with our expert advice and instructions.
1st Generation Chevy Traverse Model Years
- 2009 Chevy Traverse
- 2010 Chevy Traverse
- 2011 Chevy Traverse
- 2012 Chevy Traverse
- 2013 Chevy Traverse
- 2014 Chevy Traverse
- 2015 Chevy Traverse
- 2016 Chevy Traverse
- 2017 Chevy Traverse
Related Content
- Common 07-16 GMC Acadia Problems
- Common Buick Enclave Problems: 1st Generation (2008 to 2017)
- How to Check for Bad Transmission Fluid
- Is your Transmission Slipping, Jerking, or Low on Fluid?
- Signs of transmission failure and ways to prevent it
- Gas Cap Throwing a Check Engine Light? [Diagnose & Fix]
- Can You Drive a Car with Leaking Struts?
- What is the Difference Between Shocks and Struts?
- P0496 Code On Your Scanner
- DIY Alignment
Shop 2009 to 2017 Chevy Traverse Parts
