If you have a catalytic converter that was stolen or is broken, this catalytic converter kit featured in the video below is an easy replacement part that fits directly and won’t require welding. This means you can do a DIY catalytic converter repair, save money, and possibly have a better install than with a professional.
DIY Catalytic Converter Kit & Repair for Damaged or Stolen Catalytic Converters

What Happens When a Catalytic Converter Is Stolen?
Usually, the catalytic converter is stolen with a reciprocating saw. This can damage parts like the oxygen (O2) sensor and leave you with a damaged exhaust pipe that could be welded. We recommend replacing all of the O2 sensors at the same time as the stolen or broken catalytic converter.
Typical Steps for a DIY Catalytic Converter Repair
With a catalytic converter kit like the one shown in the video above at 3:05, the hangers included make it easy to replace a stolen or damaged catalytic converters yourself without having to weld or clamp the new converter to any old, cut, or damaged exhaust pipes.
General steps to install a catalytic converter kit
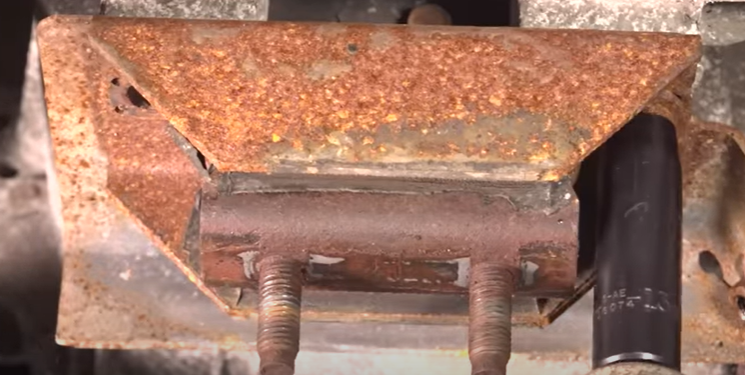
- Remove Any Protective Shields
Remove any protective shields beneath the pipes or transfer case. Usually there will be a shield held in by a few fasteners.
- Remove the Crossmember If Needed
You may need to remove the crossmember beneath the transfer case and then support (not lift) the transfer case with a lift jack or a floor jack with a solid piece of 4×4 or 6×6 wood.
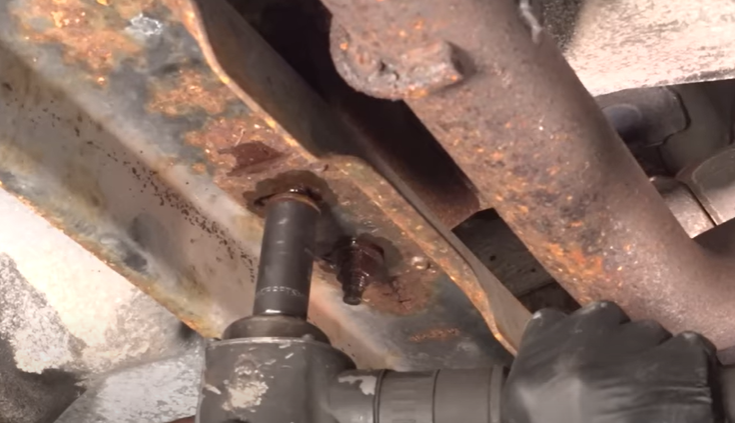
- Dismount and Lower the Exhaust Pipe
Dismount the exhaust by dismounting or removing any parts like hangers, mounts, and bolts to lower and remove the exhaust pipe.
- Install and Mount the New Exhaust Pipe Before Tightening
Before tightening any bolts or mounts to the new exhaust pipe, first install and mount it into place. Make sure the exhaust pipe is away from contacting any parts like crossmembers or heat shields before tightening all the components, like the bolts or clamps.
Tighten all of the fasteners slowly by hand, front to rear, and confirm the exhaust pipe is pulled up in place and not contacting other parts. This will prevent any rattling or vibration from the exhaust while driving.
- Install New Oxygen (O2) Sensors
Once the new catalytic converter kit has been installed, install brand new O2 sensors. Install the sensors after the exhaust kit has been installed to prevent damage.
- Adjust the Exhaust If Needed
Once all of the parts are installed, re-check the exhaust to confirm it’s not contacting other components like the heat shield. Adjust the exhaust if needed.
For example, as mentioned by our expert mechanic Sue, the metal hanger brackets can bend, which is not a big issue but may need to be adjusted with a pry bar.
More Car Repair & Automotive Tips for All DIYers & Mechanics
- Signs of a Stolen Catalytic Converter, What to Do When Replacing One, and More
- What Causes a Catalytic Converter to Go Bad?
- Your Car Smells Like Rotten Eggs – Code P0430
- P0420 and P0430 codes: Diagnose and fix like a mechanic [how-to guide + videos]
- Top 5 Ford Escape Issues: 2nd Generation (2008 to 2012)
Shop Quality Auto Parts – Free Shipping – Direct Fit