Bad distributors and ignition coils are a common cause of a Ford F-150 that won’t start. Find out how to diagnose and replace these ignition parts yourself, and learn more causes with these tips from our expert mechanics.
Causes of a Ford F-150 That Won’t Start
Bad Distributor
What Is a Distributor?
A distributor distributes energy from the ignition coil to the spark plugs via spark plug wires. It houses an ignition coil through the center of the distributor cap. A rotor inside of the distributor sends energy to each tab that connects to the spark plug wire. The spark plug wire then sends energy to the spark plug.
How to Diagnose a Distributor Yourself
General steps to diagnose a distributor
- Let the Engine Cool
Before diagnosing the ignition parts, make sure the engine is cool. You’ll want these parts to be at a cool temperature before touching them with gloves.
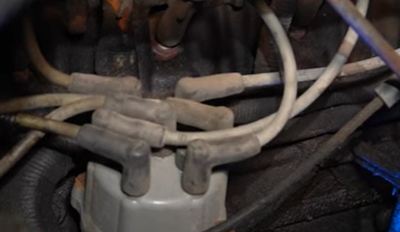
- Check the Spark Plug Wires
Spark plug wires are a wear item and are expected to fail. If they are old it might be time to replace them. Check the wires for signs of damage.
- Check the Spark Plugs
Check the condition of the spark plugs. If they haven’t been replaced within their expected maintenance interval, it might be time to replace them.
More on the different kinds of spark plugs - Inspect the Distributor
Carefully reach to the distributor and try to twist it side-to-side. If you can turn and spin the distributor, that’s a sign the engine timing may be off.
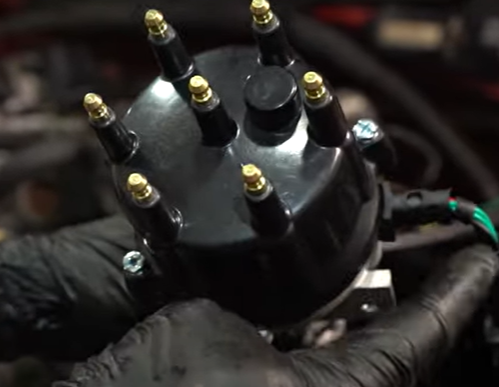
Remove the cap from the distributor and check it for damage like cracking, moisture on the inside, or build-up on the contact points.
Build-up and damage like moisture can weaken or misplace the energy sent from the distributor. Build-up can cause resistance. Moisture can occur from damage like cracks on the distributor cap or from the engine heating and cooling down over time.
If internal parts are damaged, those will also need to be replaced.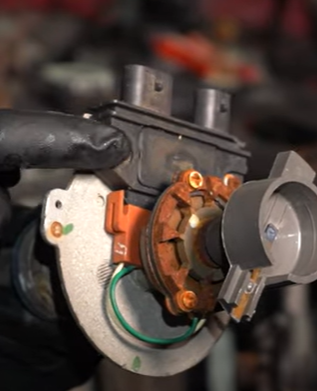
This example shows wiring and an ignition control module with some rust build-up. For example, if moisture collected in the distributor and caused rust or internal damage to the distributor, you’ll want to replace the entire unit. - Clean the Distributor of Any Build-Up
If you find build-up you can gently wipe it off and then lightly sand the contact points with light or low/high grade sandpaper or emery cloth. Sand the contact points carefully to prevent shaving them, which will prevent the connection from being weakened.
Do not use flammable or combustible material to clean the cap. You can also replace the distributor cap with a brand new one if you’d rather not clean it. - Check for Spark
Using a spark tester is an easy way to test for spark. You’ll need to connect the spark tester to the spark plug and spark plug wire and start the engine. If the tester lights up, that’s a sign the spark plug is working.
You can also test for spark by changing the spark plug with another if you have a spare. If you have spark at that cylinder with the new plug, that’s a sign it’s time to replace the spark plugs.
How to Test Spark Plugs with a Spark Tester
How to Replace the Distributor Yourself
General Steps to Replace the Distributor
- You’ll need hand and eye protection and the correct tools, like a vacuum gauge and timing light, to replace the distributor yourself. You’ll also need to know the firing order.
- Disconnect the battery and put it on a charger
- Remove the spark plug from cylinder one
- Rotate the engine crank clockwise to find top-dead-center, which is when the cylinder one piston is at the very top
- Mark the spark plug wires to know which cylinders the wires connect to
- Remove the spark plug wires from each spark plug and the ignition coil
- Disconnect any wiring harnesses from the distributor
- Take note of the exact orientation of the distributor base compared to the engine and rotor to the top of the base. The rotor should be directly facing where the cylinder 1 wire should be.
- Remove the mounting hardware from the distributor
- Remove the distributor
- Watch the rotor spin since you’ll need to align the rotor on the brand new distributor before installing
- Compare the old distributor to the brand new one
- Clean and inspect the mounting point on the engine
- Prepare the new distributor for installation by removing the cap and setting the rotor to the original position
- Install the new gasket and slide the distributor onto the engine, aligning it with the oil pump shaft in the engine. While doing this, pay attention to the orientation of the base and the rotor, as all three need to be aligned
- Install the mounting hardware, leaving it just loose enough to spin the distributor base
- Install the distributor cap
- Properly replace each spark plug wire
- Reattach the battery
- Start the vehicle and let the engine reach normal operating temperature
- If the vehicle doesn’t start or run, check the spark plug wires and firing order. Try slowly spinning the base in a direction while trying to start the vehicle. The base may be misaligned, throwing the timing off.
- Once the engine is running, time the engine with a vacuum gauge or timing light
How-to Videos for Your Automotive DIY Repairs
Check out our how-to video library for step-by-step instructions and tips from expert mechanics for help with DIY repairs on your car.
More Causes of a Ford F-150 That Won’t Start
- Battery Light on In Your Car? Low Voltage Codes? How to Tell If It’s the Battery or Alternator
- The Battery or Alternator? How to Tell Which Is Causing Your Car Not to Start
- Signs of a Bad Starter
- P0343 code: Camshaft Position Sensor Circuit High Input
- Weak Fuel Pump Symptoms: Car Not Starting, Wasting Gas, or Loss of Power While Driving
Shop Quality Distributors, Distributor Caps, Rotors, and More

More Automotive Tips
- Top 5 1997 to 2004 Ford F150 Problems
- Car Won’t Turn Over But Has Power? How to Fix an Engine That Cranks But Won’t Start
- Car Cranking or Won’t Start with No Clicking? Causes and Differences of a Crank No-Start and an Engine That Won’t Turn Over
