Vehicles can fail inspections for many reasons. You may have pre-inspected your vehicle, expecting no problems with the inspection. If your car failed the emissions test at inspection, find out what to do with these tips from our expert mechanics.
What to Do If Your Car Failed the Emissions Test at Inspection
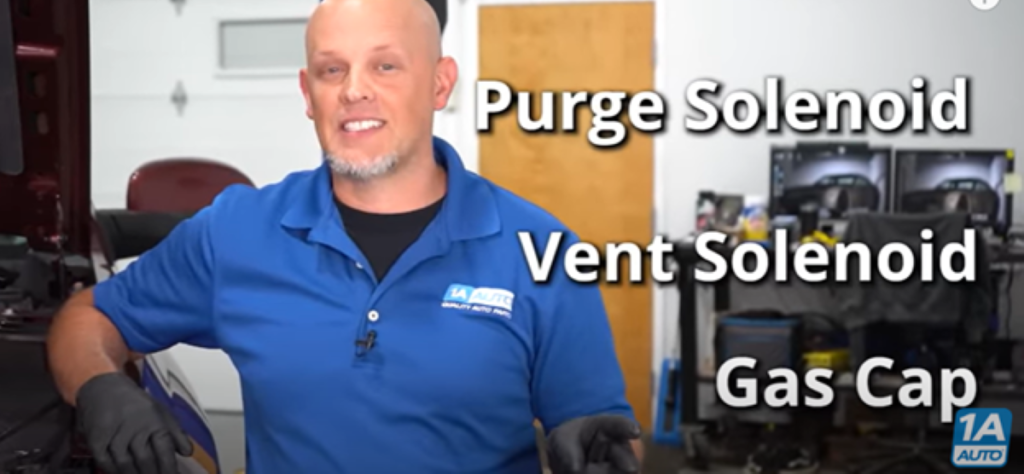
Here’s a few of the most common reasons why you’d fail the emissions test at inspection
Parts to check if your car failed emissions test at inspection
- Check the Purge Vent Solenoid
The EVAP purge valve is usually found under the hood. It purges air from the EVAP system with vacuum from the intake. You’ll usually find a hose from the intake that connects to the purge valve. Another hose will connect to the rest of the EVAP system on the vehicle. An electrical connector powers the valve to open and close as needed.
On most vehicles, you can remove and replace the purge valve with a screwdriver. Typical steps include disconnecting the wiring harness, disconnecting the hoses, and removing the valve from its bracket.
The valve should be closed, so if you can blow air through it as if it was open, it needs a replacement. Check out the featured video in this article and watch our mechanic Andy test a solenoid purge valve at 3:15
More on how a solenoid valve works in a car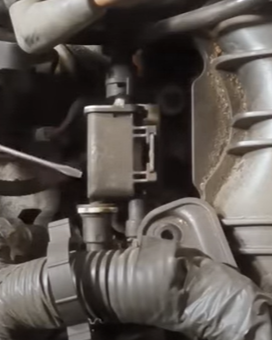
- Check the Gas Cap
If you have a check engine light on for an EVAP code, the gas cap is the first part you want to check. Pull on the gas cap and see if it’s loose. Then loosen and remove it. The gas cap might be loose, or it could have a defect like a broken gasket. Check the seal for cracking.
Check the fuel filler neck for rust build up. See if it’s collection around where it connects to the gas cap. Enough rust build-up could cause a leak and check engine light.
Make sure the gas cap ratchets appropriately and isn’t loose.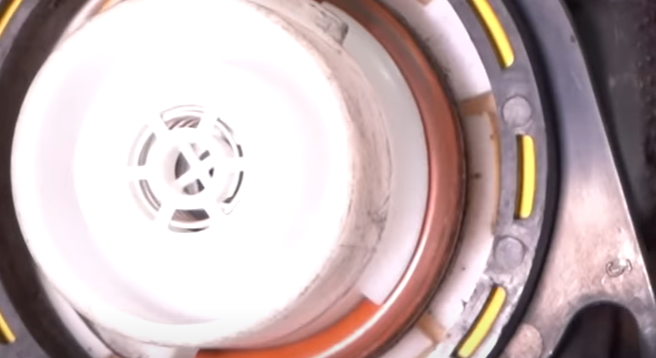
- Check the Vent Valve
The vent valve will be near the fuel tank and charcoal canister. Gas vapors exit the fuel tank and move to the charcoal canister. The vent valve lowers the vacuum of the EVAP system. It opens and closes and lets air in. Like the purge valve, it has a simple two-wire electrical connector to open and close it. Common steps to remove the valve include loosening a hose clamp and separating a hose from the valve and disconnecting the wiring harness.
Critters like spiders are one possibility of turning on a check engine light if they manage to affect the valve’s operation. You can use compressed air to test the vent valve. If air blows through the valve smoothly, that’s a sign there’s no blockage. Check out the featured video in this article and watch our mechanic Andy test a solenoid purge valve at 7:15
The valve could be stuck open, giving a small amount of airflow, which can turn on a check engine light.
More on the EVAP system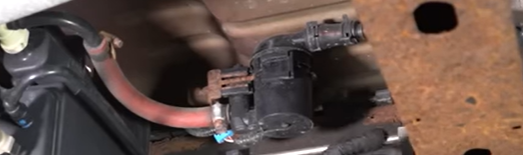
How-to Videos for Your DIY Car Repairs
Find out how to replace tons of different parts on many different vehicles and build your skills with our how-to videos.
Video: How to Replace Heater & A/C Mode Switch 00-07 Ford Focus – YouTube
Today’s Deals

