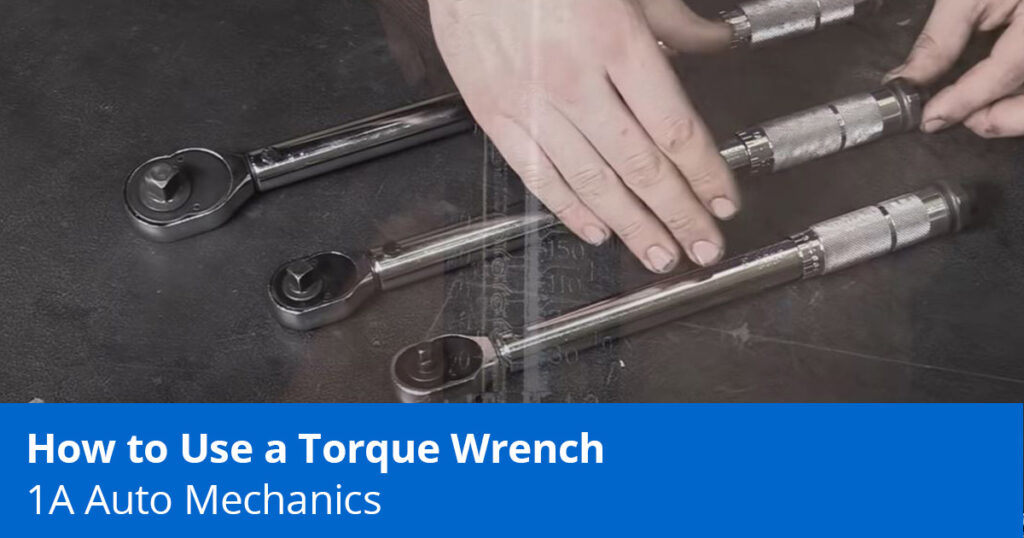
Torque wrenches come in different shapes, styles, and sizes. One of the most common types of torque wrenches used is the click-type. This post and video reviews how to use a click-type torque wrench and a beam torque wrench. We also review the differences between these two types and explain how to use a torque angle gauge and why you might need one.
What Is a Torque Wrench and Why Do I Need One?
A torque wrench is used to tighten a bolt to its torque spec. A torque spec is a specification of the rotational force needed to secure a piece of hardware as originally intended.
While some professional mechanics don’t torque every bolt, it’s good practice, and the more important bolts should be torqued when doing DIY work, like the lugs nuts and engine-related fasteners. In fact, when you don’t torque certain parts like the wheels, you may not know if they are undertorqued or overtorqued, which can cause future damage.
This video reviews more about torque wrenches and why you want to use one when reinstalling your wheels.
What Will Happen If I Don’t Torque My Vehicle’s Bolts?
Incorrect torque can cause problems like vibration, failure in wheel bearings, ABS faults, tires loosening and falling off, and more problems.
For example, if the wheel is under-torqued, the hub will not hold the brake rotor tightly, which can cause the brake rotor to loosen when braking or driving, causing brake pulsation. Loose lug nuts can also damage the studs, lug nuts, and the wheel.
Overtorquing the lug nuts can strip them or stretch the lug nut studs and warp the rim.
How to Use a Click-Type Torque Wrench
How a Click-Type Torque Wrench Works
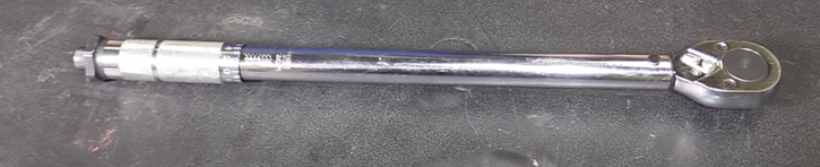
Click-type torque wrenches are adjusted and set to a measurement by the handle. They click once a bolt has been torqued to spec.
The click-type torque wrench is the most common kind of torque wrench and is easy to use. They come in different ranges with different drive sizes, and this can affect their physical size and the measurements found on the wrench. A torque wrench with inch-pounds will apply a small amount of torque, and a torque wrench in foot-pounds will apply a large amount of torque.
Torque multipliers can add more range if the torque wrench does not have enough. They are reduction gear boxes that attach to the torque wrench’s drive. They have their own drive and multiply the torque.
How to Read a Click-Type Torque Wrench
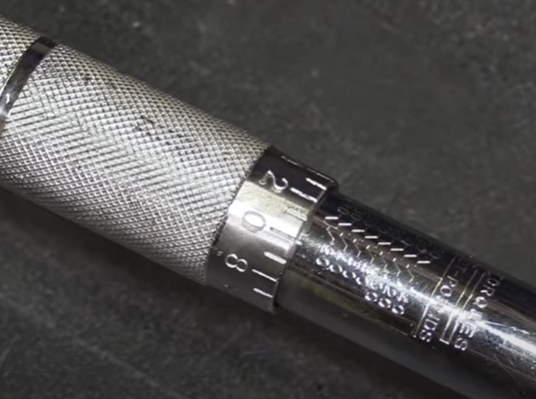
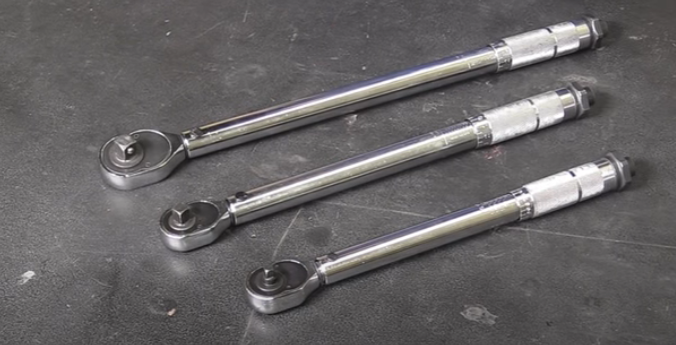
Click-type torque wrenches have two sets of numbers to set the measurement to. The numbers listed vertically on the torque wrench represent torque measurements rounded to the nearest ten. On one side, the vertical numbers will be listed in foot-pounds, and on the other side, they will be listed in newton-meters.
The slots and numbers at the tip of the handle represent the second number in the measurement setting.
How to Set a Click-Type Torque Wrench to the Right Measurement
In this post, we adjust a torque wrench to tighten a bolt to 20 foot-pounds. The specifics between torque wrenches may differ, but the process for using and adjusting them is generally the same.
Steps for Using and Adjusting a Click-Type Torque Wrench
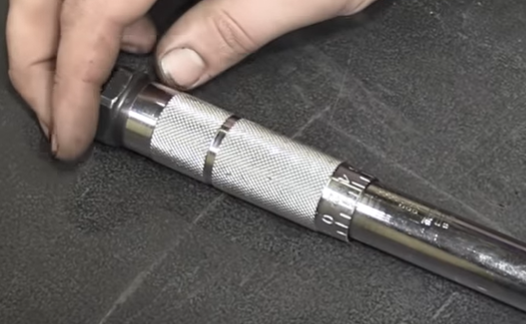
- Loosen the Lock Screw
Turn the lock screw at the end of the torque wrench counter-clockwise to loosen the torque wrench handle.
- Turn the Handle to Match the Desired Torque Spec. Do Not Turn the Handle Past Any Specs Listed on the Torque Wrench
Turn the torque handle clockwise to raise the setting and turn the handle counterclockwise to lower the setting.
Turn the torque handle clockwise to the preferred measurement, which in this case is 20 foot-pounds.
Click-type torque wrenches work off of springs. You can twist a torque wrench’s handle past the max setting on the torque wrench, but this does not mean the torque wrench can adjust for a higher setting. You do not want to use a torque wrench beyond its highest setting since there will be an inaccurate measurement and the wrench was not designed for working beyond that setting. - Make Sure the Slot on the Handle Representing the Second Number Aligns with the Adjustment Line on the Torque Wrench
Adjust the handle so the second number matches the desired torque spec, which in this case is 0.
Align the handle so the line for the second number is aligned with the line between the rounded numbers, as shown in the picture below.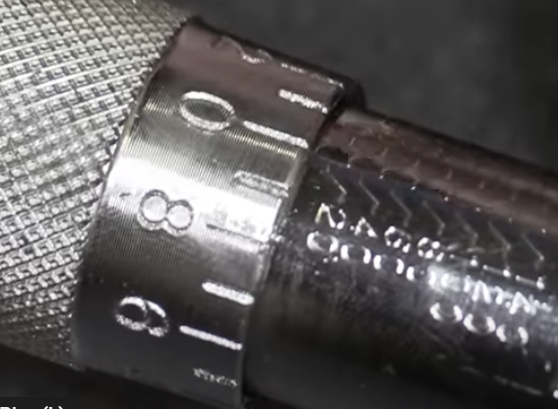
- Tighten the Lock Screw
Tighten the lock screw on the end of the torque wrench clockwise to lock it, which should prevent the handle from moving.

How to Use a Click-Type Torque Wrench Properly
1. Tighten the Bolt and Stop Once You Hear a Click
There is no need to tighten the bolt further or apply more force after hearing the torque wrench click once. When tightening the bolt, tighten it steadily, smoothly, and evenly. Do not jam the torque wrench with excessive force, as shown in the video above at 6:20. Do not tighten the bolt beyond one click, but tighten the bolt to one click and simply release it.
Tightening the bolt further after the torque wrench clicks once, and especially after it clicks multiple times, can over-torque the bolt, and can result in a different spec for each bolt like when, for example, you’re tightening lug nuts in a sequence.
Pushing down on the torque wrench after hearing it click can also over-torque the bolt. The excessive force from this method also risks damaging torque wrench’s the internal components.
2. Find and Follow Any Torque Sequences
Follow the torque sequence if there is one. Some parts may need to be torqued at one spec and then torqued at a higher spec, and some parts like lug nuts will have torqueing sequences. This video below reviews the torqueing sequences for 4, 5, and 6 lug nut patterns.
You can find torque specs and sequences for parts in factory service manuals, repair manuals for your vehicle, and online. We have thousands of how-to videos with the steps and info for many repairs on many different vehicles, including torque specs and torque sequences when they apply.
How to Properly Store a Click-Type Torque Wrench
Reset the Torque Wrench Before Putting It Away
Click-type torque wrenches are precision-calibrated. They should not be stored at any pre-set settings, even if they are only periodically used for one part, like lug nuts. Storing a torque wrench at a set measurement puts consistent tension on the spring, which will weaken it over time and eventually cause the wrench to torque at incorrect measurements.
Before storing the torque wrench away, loosen the lock screw by turning it counterclockwise and turn the handle to the lowest setting possible. If the torque wrench sits in a case there may be no need to re-tighten the lock screw, but tightening it will reduce the risk of the handle turning, especially if the torque wrench will be stored somewhere more open.
How to Properly Maintain a Torque Wrench
Use the Torque Wrench for Its Intended-Use
It’s also important not to use a torque wrench in place of other tools like a breaker bar. For example, while it is a long wrench and can provide leverage, using it as a breaker bar can damage the calibrated springs inside.
Take Care of the Torque Wrench
Dropping the torque wrench or leaving the spring compressed at a set measurement for an extended period can turn the torque wrench out of calibration.
Recalibrate the Torque Wrench Annually or Every 5,000 Cycles
We also recommend having a click-type torque wrench professionally calibrated at least once a year or every 5,000 cycles.

How to Use a Beam-Type Torque Wrench
How a Beam-Type Torque Wrench Works

A beam-type torque wrench is another kind of torque wrench. It is a cheaper alternative to the click-type torque wrench and does not need professional calibration. It also requires more focus during use since it adjusts to measurements differently and will not alert you once the bolt is tight.
Beam-type torque wrenches are also a little bulkier than click-types since they have a gauge and a second rod, and they may require a little more room to use.
How to Read a Beam-Type Torque Wrench
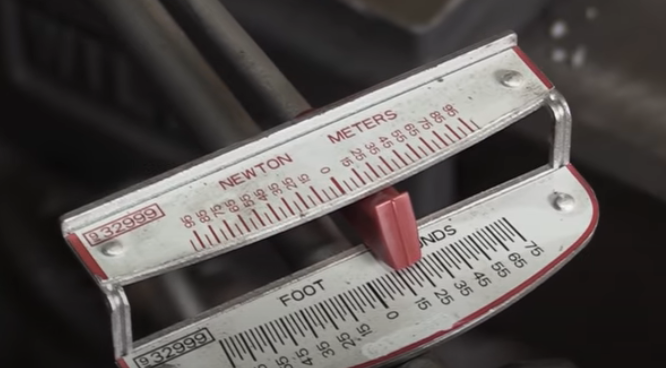
Beam-type torque wrenches have a drive that remains steady and a head that pivots. As the bolt is torqued, the beam will move. The gauge can display the correct torque reading in foot-pounds or in newton-meters. This kind of torque wrench does not make a click sound but requires focus as it meets the torque setting when tightening the bolt.
How to Use a Beam-Type Torque Wrench
Steps for How to Use a Beam-Type Torque Wrench
- Set the drive to 0 for an accurate measurement
- As the torque wrench rotates, the gauge will move
- Turn the torque wrench until it hits the mark, and then stop tightening and release the torque wrench
How to Maintain a Beam-Type Torque Wrench
Beam-type torque wrenches do not require professional calibration or any sort of proactive maintenance like click-type torque wrenches.
If they de-calibrate, you can re-calibrate them by bending the drive so that it rests back at zero.
Difference Between Beam-Type Torque Wrench and a Click-Type Torque Wrench
In a lot of cases, both a beam-type and a click-type torque wrench are easy to use. Here are some differences between each:
Beam-Type Torque Wrench
- Does not require professional calibration
- Bulkier than click-types and may require more space for torqueing
- Cheaper than click-type torque wrenches
- Requires focusing on the torque measurement when torqueing since there is no click sound
Click-Type Torque Wrench
- Requires yearly professional recalibration
- Needs recalibration if banged, dropped, used incorrectly, or left set to a measurement for an extended period
- Easier and faster to set
- Clicking sound once the bolt is tight and meets the torque spec
How to Use a Torque Angle Gauge
How a Torque Angle Gauge Works
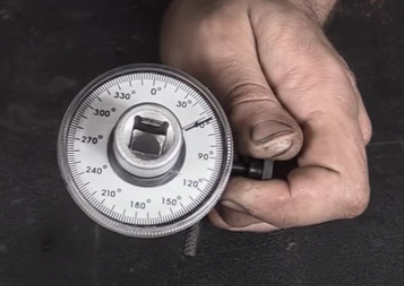
A torque angle gauge will gauge how many degrees a bolt has been turned. Torque angle gauges are generally used for higher-torque applications like head bolts and studs. Some bolts are “torque to yield,” meaning they need to be tightened to a certain specification and then to a certain number of degrees to stretch the bolt and obtain the maximum clamping force from it. These bolts are also no longer reusable once stretched since stretching them more than once can weaken and break them.
Torque angle gauges sit in between the socket and ratchet and have a leg that keeps the base from rotating. As the bolt is tightened, the gauge will move and read for how many degrees it has turned.
How to Use a Torque Angle Gauge
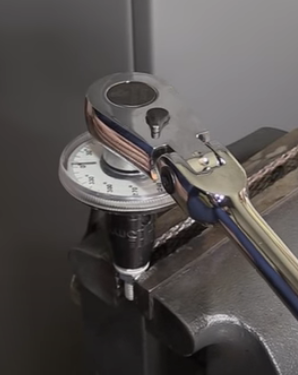
Steps for How to Use a Torque Angle Gauge
- Place a socket on the bolt
- Attach the torque angle gauge to the socket
- Rotate the base and adjust the leg to a sturdy position against a solid object
- Connect the ratchet to the torque angle gauge
- Set the dial so the measurement reads 0
- Turn the ratchet until the dial hits the desired degrees
- Remove the ratchet, torque angle gauge, and socket
Learn to Replace Parts Yourself
Learn how to replace and diagnose parts yourself. 1A Auto has thousands of how-to videos with step-by-step instructions by real mechanics for many makes and models. Find tons of diagnostic tips, car knowledge, and installation steps in 1A Auto’s how-to video library.
Related Content
- How to Use a Car Jack and Jack Stands
- How to Use a Digital Multimeter
- Car Part Terminology
- Bad Wheel Bearing Symptoms
- How to Use an OBD2 Scan Tool (Car Tester)
- How to Perform a Radiator Pressure Test
- Why is My ABS Light On But My Brakes Seem Fine?
- Causes and Fixes of Pulsating Brakes
Shop Parts and Tools at 1aauto.com
- Brakes & Wheel Bearing
- Steering & Suspension
- Headlights & Lighting
- Tools & Accessories
- Hand Tools
- Wrenches
- Repair Manuals