If you hear a humming noise from the rear of your car, truck, or SUV, there are a few different causes, and especially if you find fluid or smoke in the same area once you check it out. Our mechanic Len reveals some tips and steps to take if you hear a humming or howling noise from the rear depending on your vehicle and its application/setup.
How to Diagnose and Fix a Humming or Howling Noise from the Rear End
If you hear a howling or humming at the rear of your vehicle these are some common causes. These also apply if you hear the humming or howling and see fluid leaking or smoke at the rear at the same time. In the video, we experienced smoke at the rear in addition to the howling noise, and this is unsafe and needed to be fixed as soon as possible. With our tips, you’ll learn how to diagnose rear parts that could cause the humming sound and fix them yourself.
Shop Quality Auto Parts

Causes of a Humming or Howling Noise from the Rear of Your Car, Truck, or SUV
- Brake rotor
- Brake caliper
- Axle seals
- Brake pads
- Axle bearings
- Wheel hub bearings
- Emergency (e-brake) shoes
How to Diagnose a Humming or Howling Noise from the Rear
- Raise and Secure the Vehicle with a Jack and Jack Stand
Raise the vehicle with a jack and jack stands and feel the wheel for excessive play or stiffness. It should move in and out with minimum play, but it should not feel excessively loose or frozen stuck.
Remove the wheel for a closer look at more parts that could be causing a humming noise.
More on how to jack a vehicle up - Check the Heat of the Rotor
Make sure the brake rotor is cool to touch. Feel if any heat is radiating or if it’s warm. You don’t want to touch a burning hot rotor.
- Remove and Inspect the Brake Caliper
Look at top of brake caliper for debris and dirt accumulating. If that gets on brake pad or rotor, it will cause an issue. The debris could also cause the burning smell we smelt in the video featured in this article. Fluid burning off due to heat of the brakes will also cause a burning smell.
Take the brake parts apart for a closer look. Remove the brake caliper from the caliper bracket.
Inspect the area of the brake caliper where brake fluid should be. Remove brake pads to access the caliper pistons.
The caliper pistons have a rubber boot. Check the boots to see if any fluid is leaking, which means the piston is leaking brake fluid, and that can lead to a build up of debris on the caliper.
Check the brake caliper for excessive debris that might be collecting on the brake pads. If brake pads have debris on them, they will also need to be replaced.
More on inspecting the brake caliper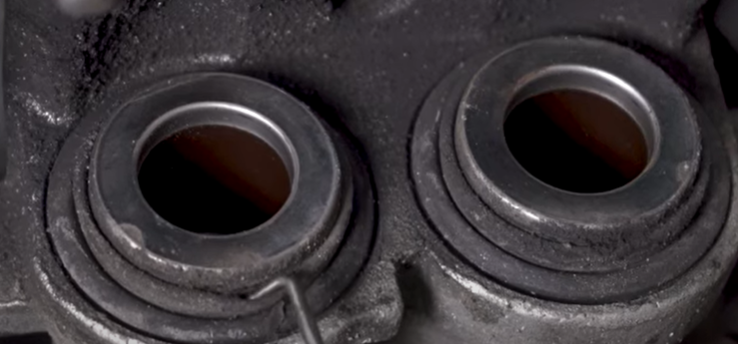
- Check the Brake Pads
See if the brake pads have any dirt or debris that might be sourced to a leak. If the brake pads or shoes are swollen from contamination, they’ll end up overheating and will need to be replaced.
More on how to inspect the brake pads - Check the Condition of the Brake Rotor
Inspect the brake rotor for hot spots. Hot spots are scored sections on the rotor that can cause discoloring, a brake pulsation, and brakes overheating.
Remove the brake rotor and check the rotor for gear oil that may have leaked onto it. We have a ridge on the rotor that’s swollen from pressing against the backing plate. The rotor could be hitting against backing plate and causing noise.
In our example the rotor has several cracks. Even one crack means you’ll need to replace brake rotor.
Check for discoloration possibly from overheating.
More on inspecting the brake rotor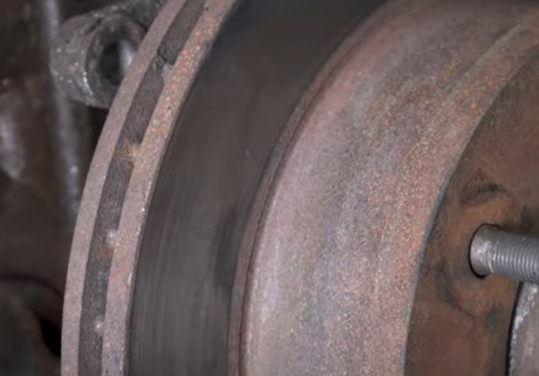
- Check the Axle Seals for Leaking
In this example, we had a rear differential axle leak. The gear oil might be leaking onto the brake shoes, which is unsafe makes for unsafe driving conditions. The axle seal may have separated, causing it to leak fluid.
The differential in the video featured in this article has a little bit different of a set up than most rear differentials. This seal is for a free-floating differential, meaning the hub in the back can “free-float” a little, so the seal has an inner portion that can spin while the outer portion remains still. There’s a spring in between the inner portion and the rubber seal. For this application, check the spring and make sure it’s seated perfectly.
If the seal is damaged, broken, or looks misplaced like it fell out, that will reduce it’s ability to apply pressure and that can cause an axle seal leak.
More on checking differential leaks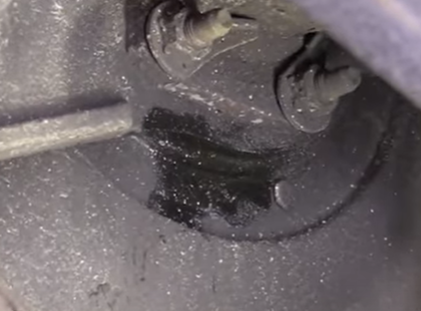
- Check the Axle Bearings Behind the Seal
Inspect the bearings located behind the axle seal. The bearings can also look different depending on the application, but for a howling noise, check the roller bearings. Look for scratching or discoloration like blue, which are signs the bearings are overheated and have wear.
Wiggle the bearings and check for movement. Generally a little movement is fine, but if there’s excessive movement like it wants to separate or come loose and pop out, it will need a replacement.
Typically, there will be multiple bearings, consisting or an inner and outer bearing. In this example the outer bearing is in the open, but on a different differential there might be a seal with a bearing located behind it that’s harder to see. Generally, for the outer bearing you’ll have to remove the seal and give it a quick inspection. There will also be an inner bearing, which compared to the outer bearing is harder to inspect without taking apart the differential.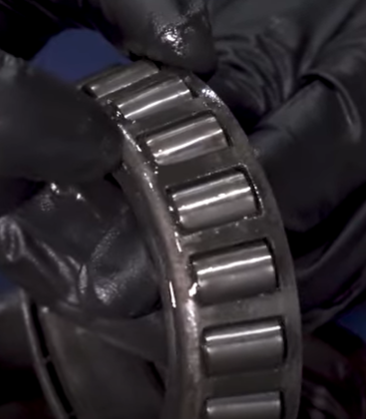
- Check the Emergency Brake Shoes
Inspect the brake shoes for any damage or wear. If the brake shoes are covered in gear oil, they’re contaminated and you can only service them by replacing them. If you need to replace the brake shoes, we also recommend replacing the hardware at the same time.
Inspect this area thoroughly. We also found gear oil along the area of the backing plate, and on further inspection this area gave an appearance of being ground into something, as if a part has been riding up and hitting against the plate.
More on how to adjust brake shoes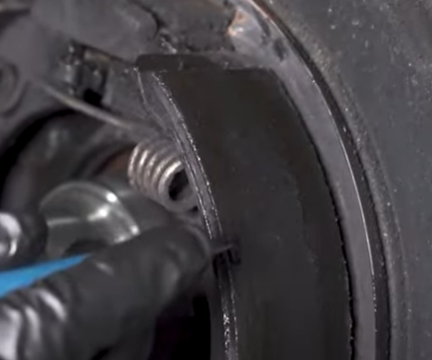
- Check the Backside of the Wheel Hub
In the example in our video the seal on backside of the wheel hub looks grounded up and scored. The backside had been hitting the backing plate near seal, causing damage and making a howling sound.
More on how to inspect a wheel hub
How-to Videos to Help With Your Repairs
Our how-to videos have step-by-step instructions from experienced mechanics to help you diagnose and replace parts on many models yourself. Whether or not you’re an experienced DIYer or mechanic, learn how to inspect and replace your own parts with our tips.
Shop Quality Auto Parts
More Content
- Car Pulls to the Right or Left on the Highway? Check These Parts
- Poor Gas Mileage? Check These Air Intake System Parts
- What Type of Headlights Do I Have?
