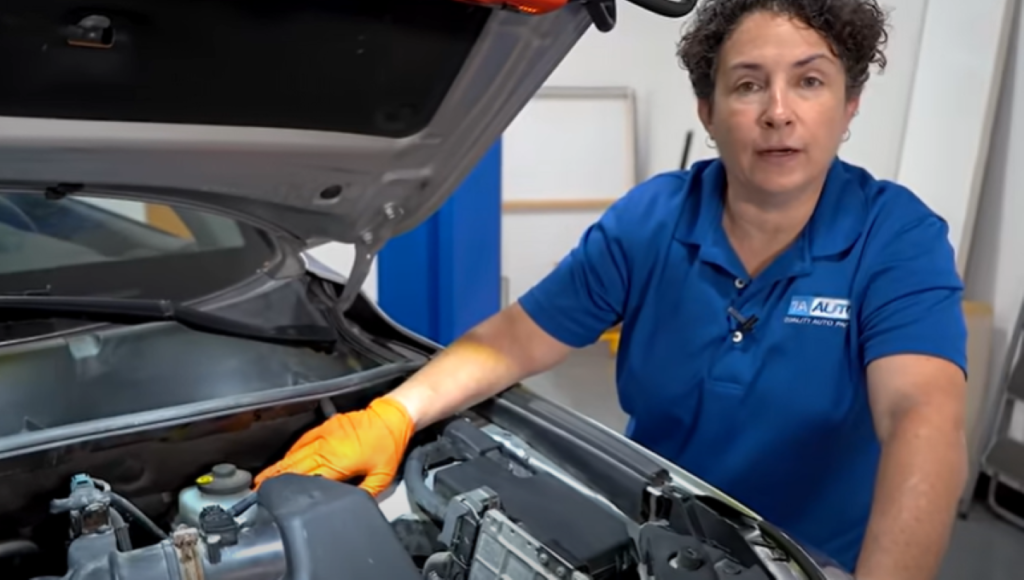
Driving with air in the brake lines can cause a spongy brake pedal or a brake pedal that continues to sink to the floor with the vehicle stopped. If you want to know the correct order to bleed the brakes in your car, how to bleed the brakes correctly by yourself or with an assistant, or want to know more about the process of bleeding your brakes, this guide and video has tips from one of our expert mechanics on the right way to bleed your brakes, when you should, and why it’s necessary.
Do I Need to Bleed My Brakes?
Air will reduce pressure in the braking system by causing the brake fluid to reach its boiling point faster and overheat, reducing your ability to brake and making it unsafe to drive. Pressure will keep the system at a moderate temperature and is necessary for the braking system to work, so you don’t want air in the braking system.
If I Only Replace the Front Brakes, Do I Need to Bleed the Rear?
We recommend bleeding the rear, even if you’ve only replaced the front brakes. Leaving old fluid in the braking system means there will be a difference in temperature and boiling point for the fluid traveling to the rear and front. The old brake fluid will break down, so for better performance, we recommend taking care of the entire system at once.
When Should I Bleed My Brakes?
Bleed Your Brakes Every 50,000 Miles or Sooner If You Frequently Drive
You should bleed your brakes if the fluid has not been changed for over 50,000 miles. If you drive the vehicle often and it makes a lot of frequent stops, you might want to flush the brake fluid before this number.
Bleed the Brakes When You Replace Brake Parts
You also want to bleed the brakes if the brake fluid is old, contaminated, or leaking, or if you’re replacing a part of the braking system, like the master cylinder, brake lines, brake caliper, or brake pads and rotor. Any incident where air may have entered the system is a time where you want to bleed the brakes.
Bleed the Brakes If You Notice a Spongy or Squishy Brake Pedal
If the brake pedal sinks to the floor or doesn’t stay firm with the vehicle at a stop, there might be air in the system that’s affecting your vehicle’s ability to brake.
What Is the Correct Order to Bleed Brakes?
The Correct Order to Bleed Your Brakes Depends on Your Vehicle, But Generally from the Rear to the Front
The correct order to bleed the brakes on your car varies depending on the brake system. There are different ways to bleed brake systems and it’s not as easy as it seems. For example, if you’re working on a Corvette where the caliper has 6 pistons and 2 bleeder screws on each caliper, you’ll have to do the inner and outer parts, then go to front, then the rear, and then the front again. Following a different process than the one that works with your braking system could cause problems like overheating or smoking brakes.
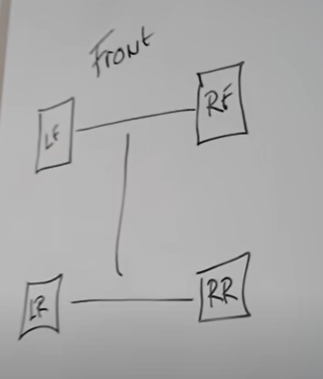
Most cars, however, have a system where the master cylinder is at the front driver side under the hood, and where one set of brake lines connect to the front wheels and one set connects to the rear wheels. The process usually involves bleeding from the brake screw on the brake caliper by beginning at the left rear wheel, then bleeding the right rear wheel, then the left front wheel, and then the right front wheel.
You want to go to the shortest path of pressure last, so you want to start at the line that’s furthest from the master cylinder. This is because as the air is pushed out from the furthest end, the system will compensate on the other side, which is the shortest distance and the last to be bled.
To find out what order to bleed your brakes in, find the master cylinder and follow the brake lines. Follow the brake lines and if you notice two lines directed to the rear, which is common, there is one line for each side, and you’ll need to follow the common process of starting at the RR, then LR, then RF, and then LF to bleed your brakes. You can follow the brake lines directly on your car or find a diagram online.
The brake lines may be coated or open to the elements and prone to rust depending on the year, make, and model.
If you see a junction and decide to replace part of the brake line with a new union without replacing the rest of the lines, you may not be able to and we do not recommend it. It is illegal to do this in some states, you can fail a state inspection and it’s also dangerous. We recommend replacing the entire brake line.
If you’re planning to install new brake lines, aftermarket brake lines are easier to bend and install. Just keep them away from moving parts and fasten them down. You don’t want the lines vibrating or rubbing against metal.
If you’re replacing the brake caliper, make sure it has copper washers. If it doesn’t, we recommend buying copper washers. Grooves on top of banjo bolts keep the washers from moving when bleeding since it’s under a lot of pressure and you don’t want it to move, but these grooves also make the washers unusable as they will warp the old washer, it won’t sit right, and this will cause brake fluid to seep out.
How to Bleed Your Brakes
Steps on how to bleed your brakes
- Grab the Right Tools
You can bleed the brakes with new brake fluid, safety glasses, an assistant, a jack and jack stands, breaker bar, drain pan, torque wrench, plastic hose, a bottle, and an 8 mm or 5/16 inch wrench.
Purchase the tool featured in these steps at 1aauto.com to bleed the brakes by yourself.
Read more on how to bleed the brakes by yourself.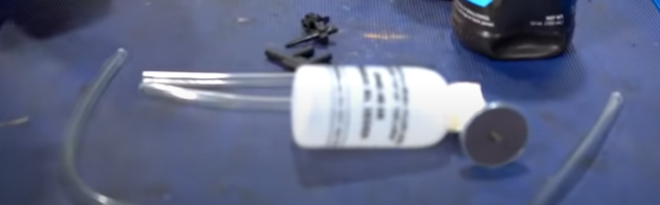
- Check the Condition of the Master Cylinder, Master Cylinder Cap, and Brake Fluid
Begin this process by starting at the master cylinder. Check the master cylinder for leaks, and check the condition of the cap and the brake fluid.
Make sure the master cylinder cap is not swollen. Contaminated fluid or the wrong brake fluid will swell and break the brake master cylinder’s cap.
Wear safety glasses when working with brake fluid in case any gets on you.
You can check and remove the brake fluid with a fluid removal tool, and you might have to remove the screen in the master cylinder and clean it.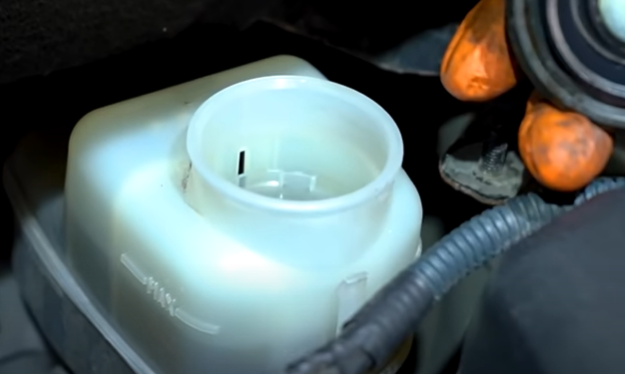
- Remove the Old Brake Fluid and Replace It
After you’ve removed the fluid with a special fluid extractor tool, put old brake fluid in a sealed container, and bring it to a local mechanic or even a national chain. They will likely take the fluid and dispose of it for you.
Fill the master cylinder reservoir with new brake fluid. The master cylinder cap will state what fluid the system needs. In our example, the cap says DOT 4, but it could say DOT 3 or 4
Note: Don’t mix DOT 3, 4 and 5 together.
Pro Tip: With the fluid checked and the old fluid removed, top off the master cylinder and replace the cap. We recommend 2-3 jugs of brake fluid for a brake flush.
Note: If the master cylinder seems difficult to access, there might be an access door on the cowl panel that you can remove.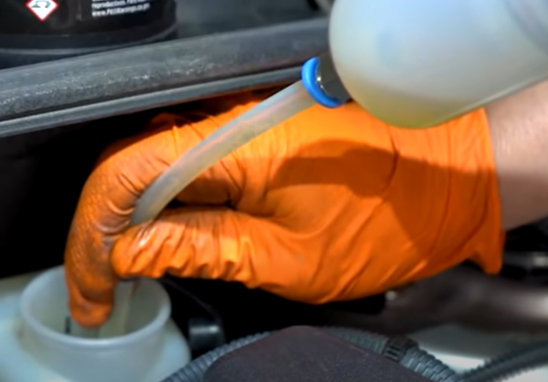
- Raise the Vehicle with a Jack and Jack Stands
To check the brakes, loosen the lug nuts with the tire on the ground, raise the vehicle and secure it on a jack stand, and then remove the tire.
- Start at the Right Wheel
Find out the correct order to bleed your brakes. As mentioned, if you have two brake lines going to rear, there will be one line directed to each tire. This means you’ll be starting at the right rear tire, or the tire at the rear on the passenger side, which is the brake line farthest from the master cylinder.
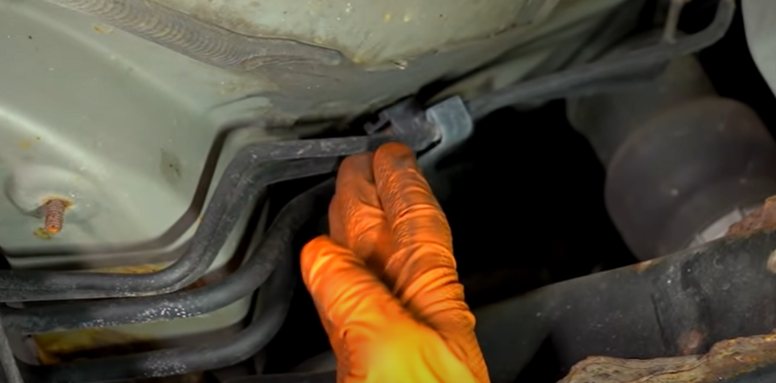
Remove the boot from the bleeder screw and grab an 8 mm or 5/16″ wrench to loosen the screw. - Place a Small Amount of New Brake Fluid in a Bottle and Attach It to the Screw
Open the brake fluid bottle and carefully remove the protective cover without letting any pieces fall inside.
Put some of the fluid in a bottle.
Learn more on how to create your own bottle if you do not have a brake bleeder kit
Putting fluid in a bottle will prevent air from retracting into the system when the bleeder screw is loosened. This way you’ll remove air from the system and replace it with fluid.
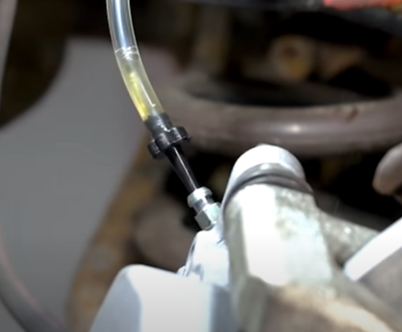
Attach a clear hose from the bottle to the bleeder screw, and use an attachment if needed to prevent air from leaking into the system.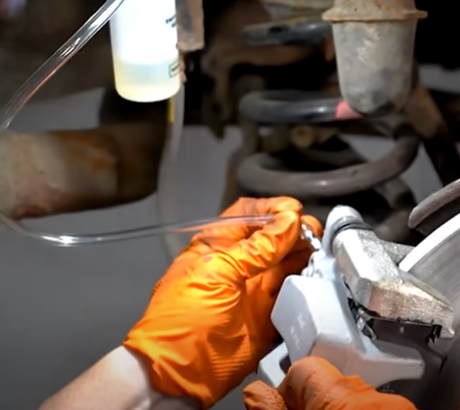
- Loosen the Bleeder Screw and Inspect the Fluid
Open the bleeder screw 1 full to 1 ½ turn. Fluid will come out, and if there is air you will see air bubbles in the fluid.
- Slowly Press the Brake Pedal to the Floor 3 Times
Slowly press the brake pedal to the floor, and then retract it at a steady pace. Repeat this 3 times. Any air should remove from the lines and be replaced with brake fluid.
- Tighten the Bleeder Screw Once the Air Bubbles Dissipate
Close off the line once the air bubbles dissipate by tightening the screw. Remove the hose from the brake caliper and dump the fluid into a catch basin. You don’t have to empty the bottle completely. This will keep you from having to re-add brake fluid for every wheel.
Then replace the bleeder screw cover.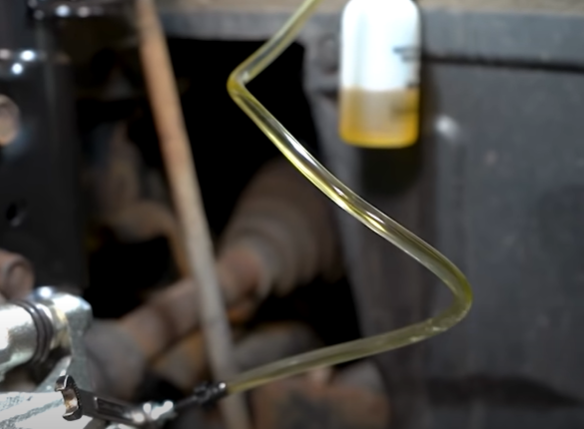
- Repeat this Process for Each Wheel While Checking the Brake Fluid Level in the Master Cylinder
Go to next wheel, which in this case is the right rear wheel. Before working on the next wheel, check the brake fluid level in the brake master cylinder. Top off the cylinder if needed, and check it before moving to the next wheel. If you do need to add fluid, remember to put the cover back on the brake master cylinder.
- Once Completed, Feel the Firm Brake Pedal and Start the Car to Test the Brakes
After you’ve bled the brakes, with the vehicle off press the brake pedal, which should feel very firm.
Start up the vehicle, which will test brake booster. The brake pedal should sink normally with the car started. - Clean the Brake Area with Brake Parts Cleaner
Clean the brake caliper with brake parts cleaner to remove any brake fluid that might’ve leaked.
- Road the Test the Brakes
Be sure to torque the wheels to specification before road testing the brakes.
During the test, feel where the pedal holds, sit for a few minutes and make sure it’s not sinking or slowly moving down to the floor. If it is, there is still air in the system.
Find a safe area and simulate a panic stop to see how well the brakes work.

Now That You’ve Learned the Correct Order to Bleed Your Brakes, Watch More DIY Tips
Our how-to videos will empower you to do your own car repairs. You’ll learn how to diagnose and replace parts by following the steps and tips from our expert mechanics.
Read More Tips Beyond How to Bleed the Brakes
- Bad Lower Ball Joint Symptoms? How to Check Front Lower Ball Joints with a Dial Indicator
- Car Door Rattles? How to Check for a Loose Window
- Top 10 Videos of 2021
- Common 4.0 Liter Jeep Engine Problems on the 1984 to 2001 Cherokee
Shop Parts and Tools
- Brakes & Wheel Bearing
- Steering & Suspension
- Headlights & Lighting
- Drivetrain
- Heating & Cooling
- Fuel & Emissions

Good information! “Wheel farthest from the master and work toward the master cylinder.