If your power window is not working, there could be a bad power window motor, a bad power window switch, or a problem with the wiring. Having a power window that won’t work can be really annoying. Not only does it leave your car with a potential safety risk but also makes it hard to let the air in whenever you need to.
How Power Windows Work
A lot of vehicles today come with electric windows as standard equipment, and they work in a similar fashion with slight variations in how they are wired. A typical power window system comprises a two-way control switch, wiring, and a motor.
Power is first sent from the battery to the power window switch. This is normally done via a relay and fuse or circuit breaker. From the switch, it’s sent to the motor via two circuits. Lifting the switch, as it is common in most cars, allows the circuit to drive the motor, which then winds the window up. Pushing on the switch downward allows the motor to wind the window down.
When there’s a problem with the power window switch, motor, or wiring, your car window won’t go up. It could also remain stuck closed and refuse to go down.
In this video and the post below, we’ll take a look at how you can easily diagnose a power window that won’t work by testing a power window motor, two-way control switch, and the wiring.
Tools you’ll need
- Flat blade screwdriver
- Wrenches
- Test light

Steps to diagnose a power window that’s not working
Step 1. Access Your Power Window System
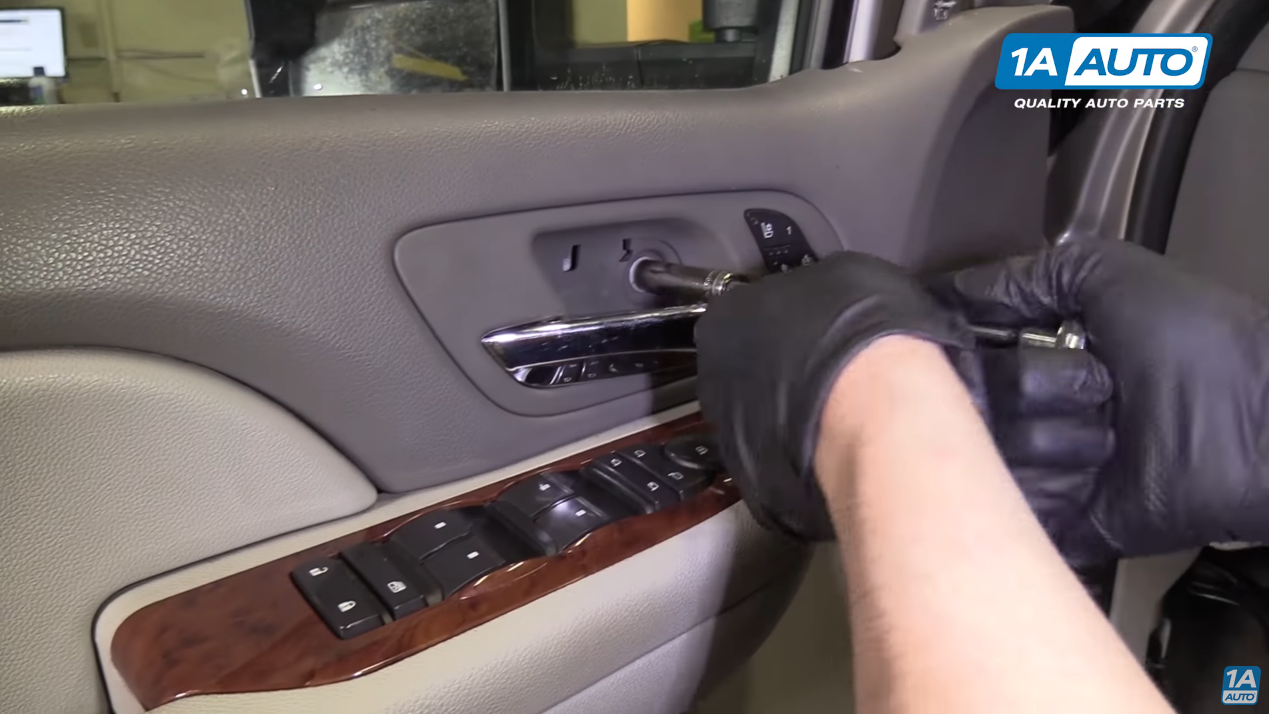
To access your car’s power window system, you’ll need to remove the door panel. Use a set of wrenches to remove any bolts that screw the inner panel in place.
You may encounter a sheet of plastic covering the system on the inside that you can pull out and set aside. Remove it carefully and avoid breaking or ripping it as you will need it when reassembling the door.
Step 2. Confirm that your test light is working
Start by confirming that you have a working test light. You don’t want to test the circuit with a bad test light.
Open the hood of your car and access the battery. Connect the lead end of your test light to the negative battery terminal and place the tip of the test light on the positive terminal. If your test light doesn’t light up, you may need to replace it. You can get one by visiting 1A Auto.
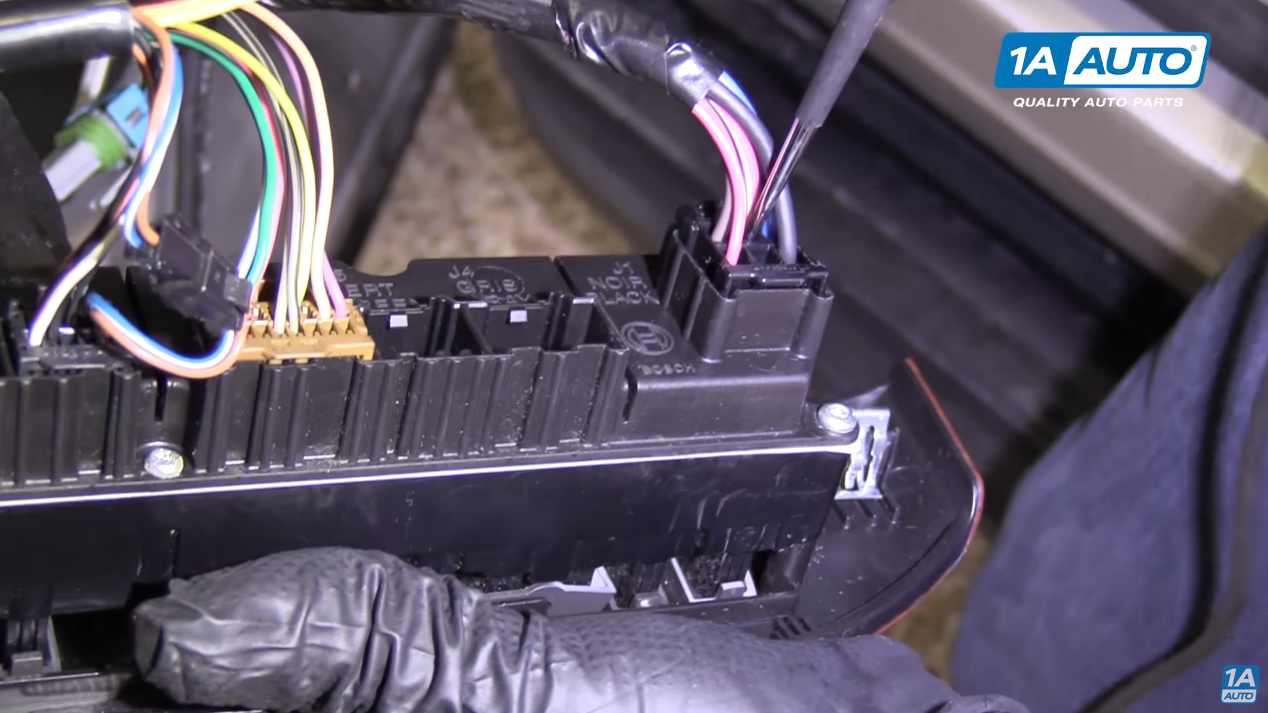
Step 3. Identify the power window motor
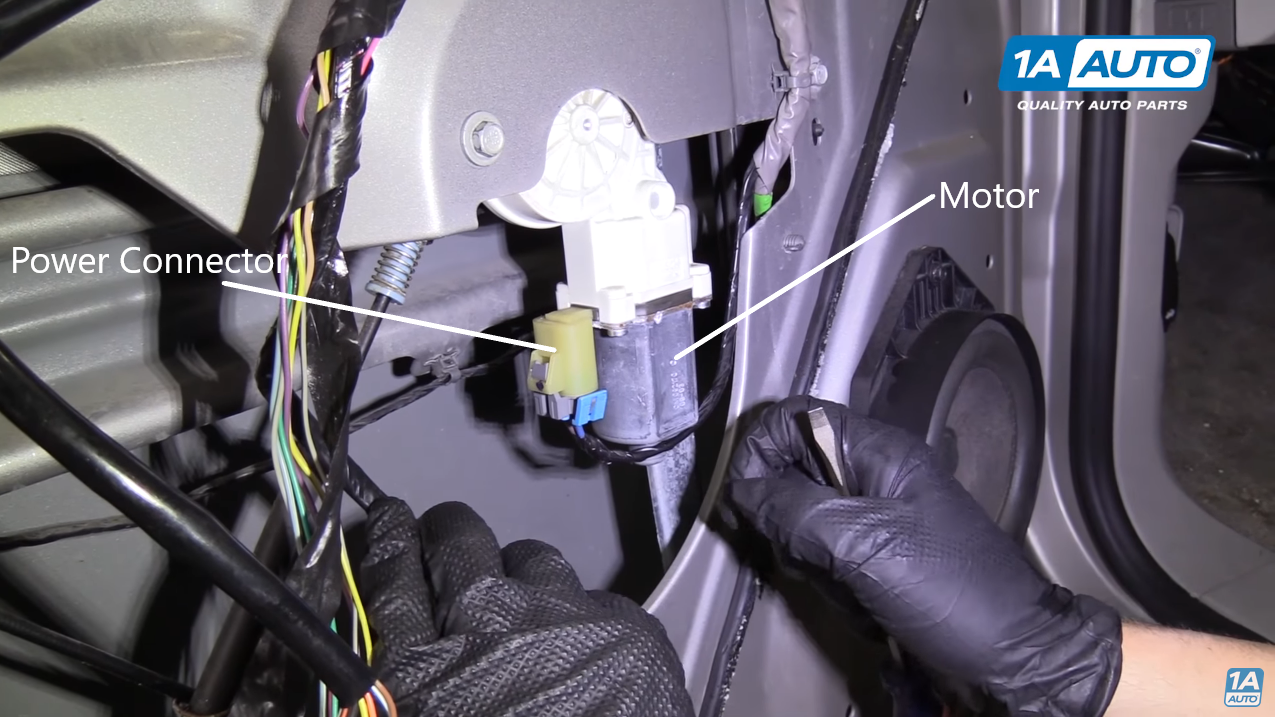
If your test light is working fine, locate the power window motor. You’ll want to test if it’s getting power supply from the switch. Start by identifying the wires that lead from the switch to the motor.
Step 4: Disconnect the electrical connector
Once you have identified the wires, disconnect the connector that allows power to get to the power window motor. You may need to use a flat blade screwdriver to do this depending on the connector housing used.
Step 5: Turn on the ignition
Turn on the ignition to power up the car’s electronic components including the power window mechanism.
Step 6: Check for power and ground at the power window motor
Start by connecting a straight pick at the lead end of the test light to make it easier to test the connector that you disconnected in step 4.
Lightly touch the terminals of the connector with both ends of the test light. Avoid pushing them in too hard. Flip the power window switch up and down and check the test light. If it does not light up, it means that there’s no power supply to the motor.
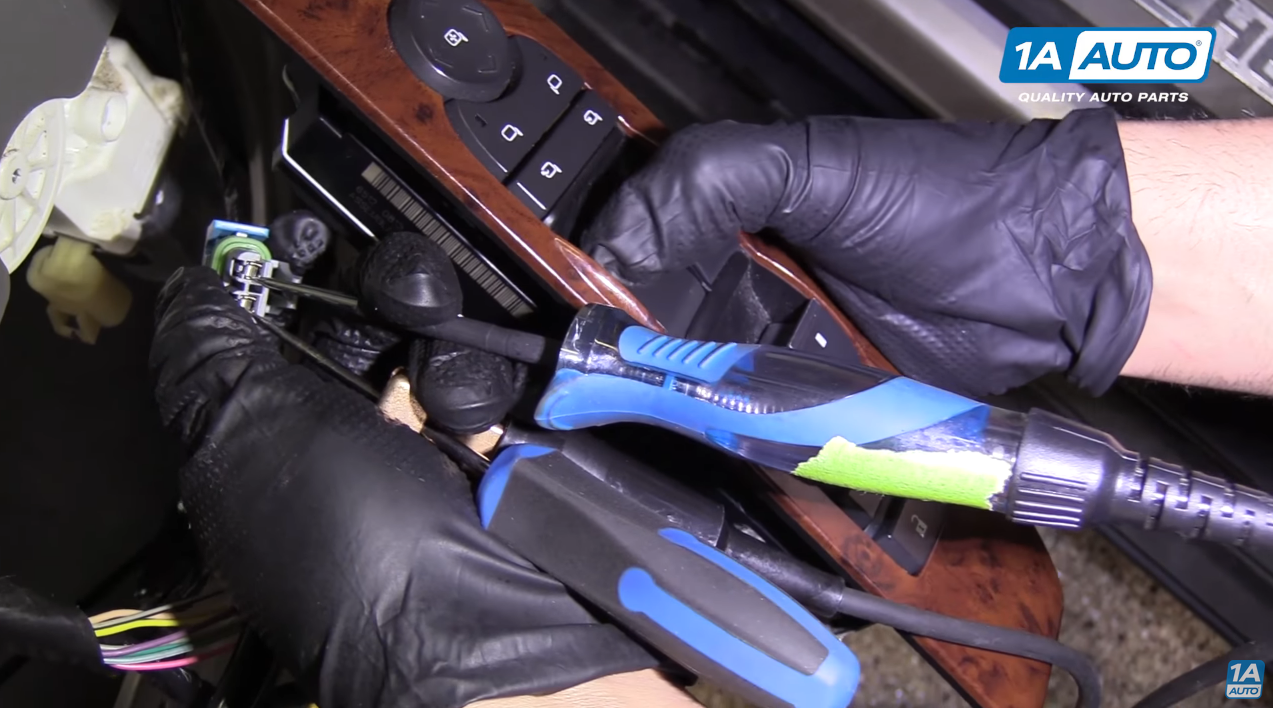
Step 7: Test for power and ground at the power window switch
Set the straight pick aside and connect the lead end of the test light to a good ground. This could be on a bolt located on the door panel.
Test the power feed at the switch. The test light should light up if your switch is getting power from its battery connection.
If the test light comes on, use it while it’s still grounded to check for power at each of the connector terminals to confirm if there’s power supply. Remember to activate the power window switch up and down as you check the test light.
If the connector still shows there’s no power, test for ground at the switch. You can reinsert the straight pick to the lead end of your test light to make this easier.
If the power window switch has good power and ground but its connection to the power window motor doesn’t, it means that the switch is not sending power to the window regulator. This could be caused by a bad switch or break in the circuit caused by damaged wires.
If the test light comes on when probing both terminals of the connector, as described in step 6, that means there’s nothing wrong with the switch or its connection. The problem could be your window power motor.
If you diagnose your vehicle and determine that the power window won’t go up or is stuck closed due to a bad motor or switch, you’ll need to replace the latter. You can check out 1AAuto.com for quality power window motors and switches.
Shop Parts Featured in This Post
Related Content
- How To Install Replace Window Motor
- How To Replace Power Window Switch
- Car Window Stuck Down – How To Fix Power Window
- Car Window Won’t Go Up
- What Does a Window Regulator Do?
- Why Are My Power Windows Working Intermittently?
- My Car Window Won’t Roll Up or Down
- How to Diagnose and Fix A Squeaky Car Window
- How to Fix a Car Window That Won’t Roll Up
