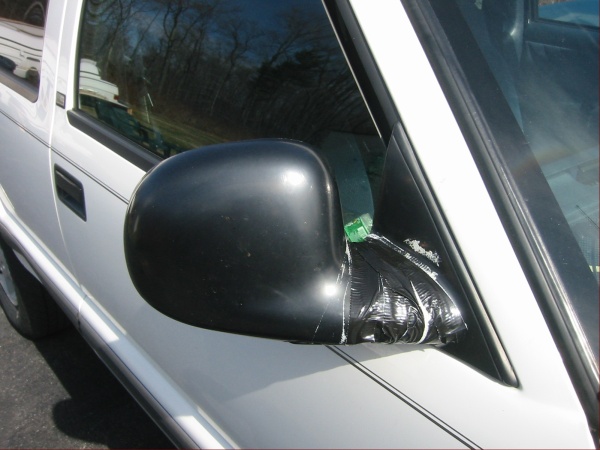
Recently we replaced the passenger side power mirror on a 1997 S-10 Blazer. The owner of this Blazer got a bit too close to a support column in a parking garage, and broke the mirror at the hinge. (Note the custom duct tape repair.)
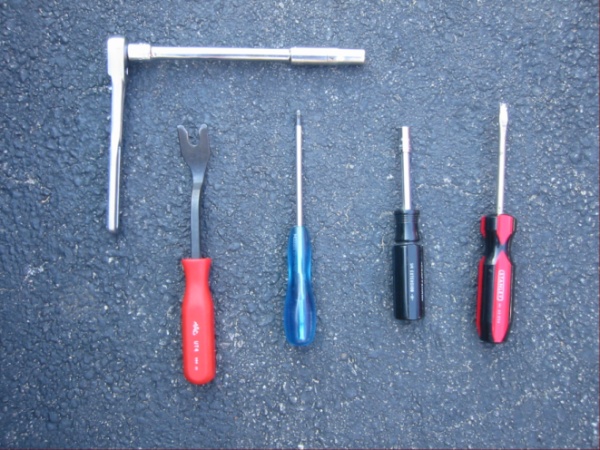
The tools we used for this installation:
- A 7mm nut driver
- A 10mm socket & ratchet
- A flat head screwdriver
- A Phillips head screwdriver
- A door panel removal tool
First match your new part to the one you are replacing to be sure it’s the right one. It’s better to find out now that after you have your whole door torn apart.
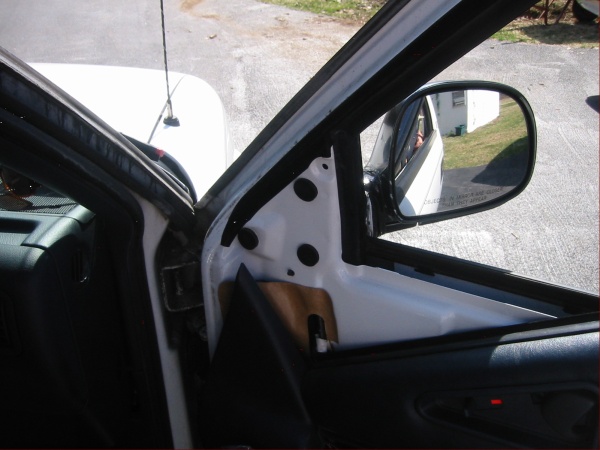
On some vehicles there is a small access panel that needs to be removed to expose the mounting bolts or nuts. The small access panel allows easier mirror replacement, and is usually attached with only 2 or 3 plastic door panel clips. Our 1997 S-10 Blazer unfortunately did not have this access panel, so we had to remove the whole interior door panel for replacement.
Most door panels are held on by a few bolts and screws, plastic door panel clips, and the lower lip of the window opening.
We first removed two 7mm bolts inside the door pull handle. There was also a trim screw on the door handle bezel. The window and lock switch panel can also be removed for easier access to the plastic door panel clips inside. Once the hardware is removed, take your door panel clip removal tool and wedge it between the door and the door panel itself, slide the tool along until the tool runs into a clip. Position the tool so the clip is in the middle of the fork, and pry the clip out. Use of a door panel clip removal tool lessens the chances of damaging the door panel, and in most cases you can also reuse the clips.
Once all the hardware is off, and the clips are released from the back of the door panel, carefully lift the door panel up and over the lip of the window opening.
Now the door panel is only held by the inside door panel bezel and handle, but you can turn it to access the mirror mounting holes.
Next you need to reach into the door and disconnect the mirror power cord. Then remove the 3 foam rubber covers over the access holes, and remove the 3 10mm nuts that hold the mirror to the door.
A tip to prevent dropping the nuts into the door panel and completely ruining your day: Apply a bit of grease to the end of your socket to help hold the nuts.
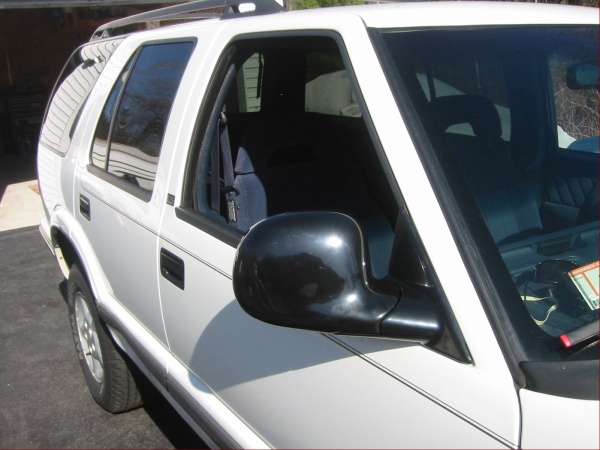
The first step to the installation is to plug the new mirror in, and make sure it works properly.
Next reattach the mirror with 10mm nuts (remember the grease trick). Then reinstall the door panel. Inspect the plastic clips to be sure none are broken. If they are, you will need to replace them. Reinstall the 2 7mm bolts in the pull handle and the trim screw in the door handle bezel.