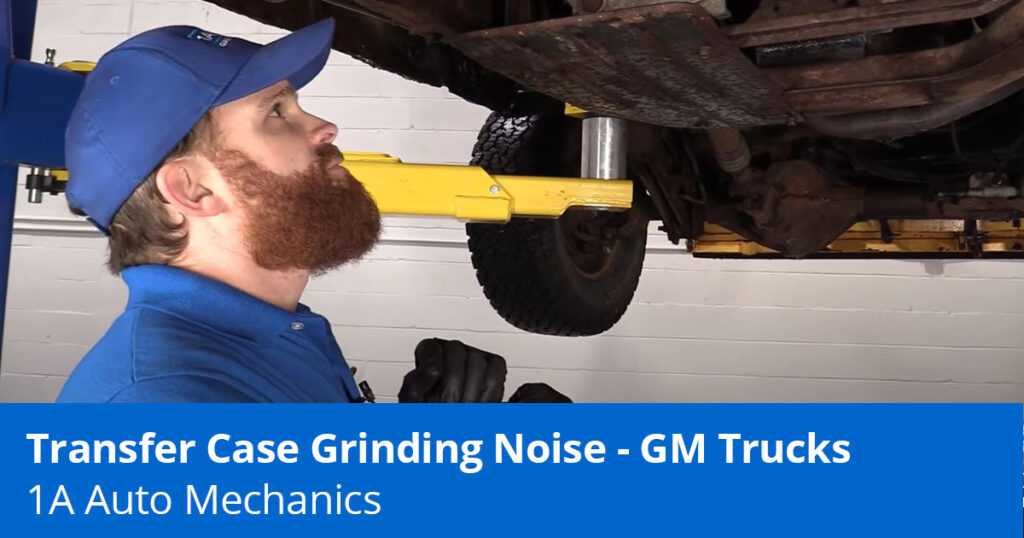
Diagnose and Fix That Transfer Case Grinding Noise
One of the most common transfer case problems in older GM trucks, built between the years 1988 and 2000, is they tend to produce a transfer case grinding noise at some point in their functional lives. This typically happens when the driver tries to switch between 2WD and 4WD. The noise originates from the center of the truck, just where the transfer case is. Our mechanics explain what causes this grinding noise and how to fix it yourself with these steps.
Why Is the Transfer Case Making a Grinding Noise?
These vehicles have two- and four-wheel-drive systems that engage manually. The part that facilitates this shift is the transfer case. It comes with an output shaft that sends power to the axle. At the tail end of the output shaft, GM put a snap ring that holds it in place. It makes sure the shaft sits steady and gets into contact with the gears the right way.
One of the biggest transfer case problems is sometimes the snap ring breaks and leaves the tail end loose. As the shaft moves in and out, it misaligns with the gears and leaves a metal-to-metal contact that is not copacetic anymore. This then results in the transfer case grinding noise that you hear any time you shift between 2WD and 4WD.
To fix this transfer case grinding noise, you’ll need to replace the broken snap ring. Here’s how.
How to Fix a Transfer Case Grinding Noise in Your GM Truck
Tools You’ll Need
- Complete metric wrench set
- Penetrating spray
- Ratchet
- Pry bar
- Tape
- Rubber mallet
- Parts cleaner
- Gear oil
- Funnel
- Bucket/drain pan
To replace a broken snap ring, follow the steps outlined below.
- Remove the Rear Driveshaft
Start by spraying the rear end of the driveshaft with some penetrating oil. You’ll want to mark where the shaft connects to the rear differential. This ensures that you do not make a mistake when screwing everything back in place.
There are four bolts that connect the driveshaft to the rear differential. Start by unscrewing them using a wrench. Be careful not to lose any of the bolts. Once they are all out, put a collection bucket underneath and pick your pry bar.
You’ll want to pry in between the yoke of your differential and shaft for the latter to come out. Be careful as it can fall and hurt you. The driveshaft will have some caps at the end that have bearings inside. You can put tape on them to make sure they don’t fall off.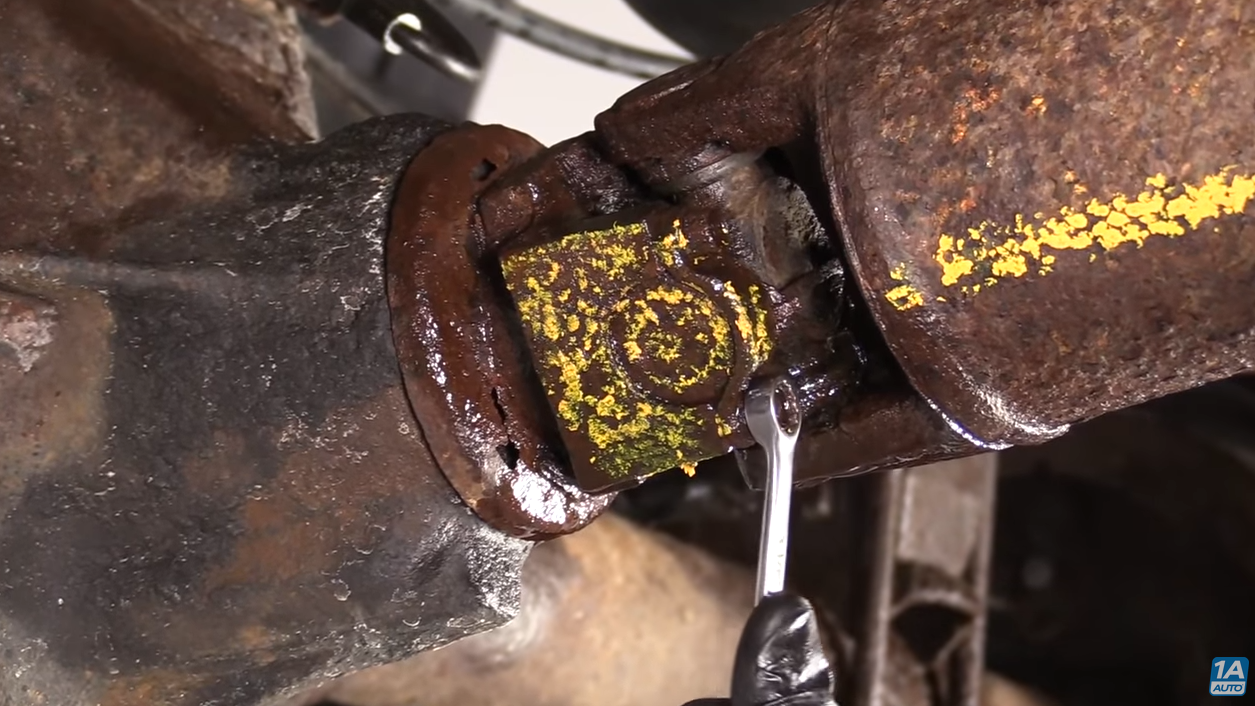
- Remove the Driveshaft from the Transfer Case Output Shaft
Removing the driveshaft on the front end is relatively easy. All you’ll need to do is slide it out from the transfer case output shaft.
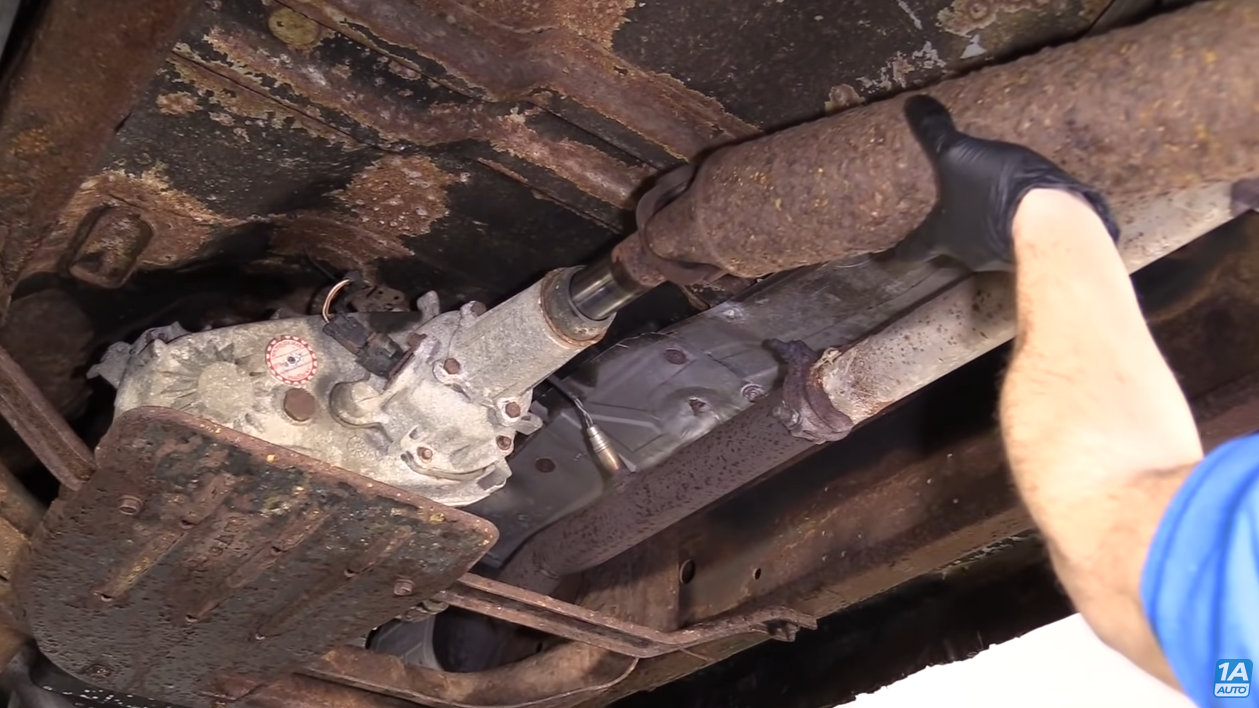
- Remove the Tail Shaft Housing
The tail shaft housing is secured by four bolts. You’ll need to remove those using a wrench. Once they are all out, place a bucket just beneath the housing to catch any fluid that may come out. Pick your rubber mallet and pound just slightly onto the housing as you pull it out.
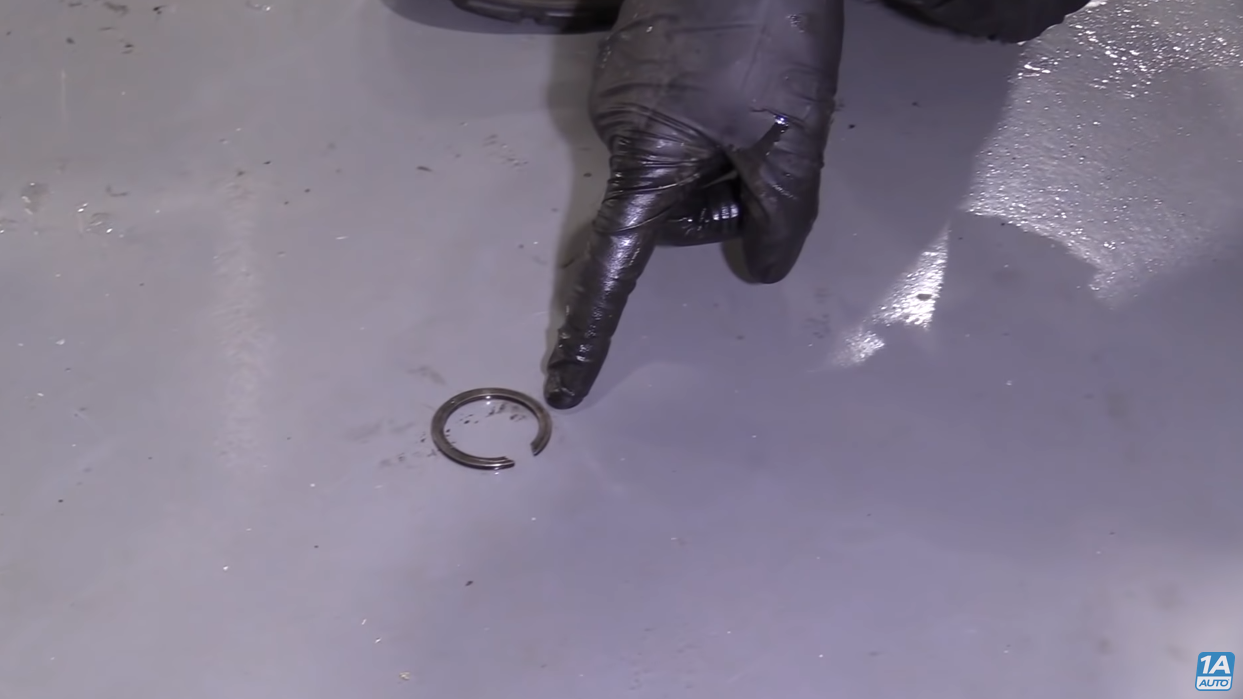
You should find the snap ring on the output shaft. Sometimes, it may come out together with the housing. If the ring appears worn out or broken, it was definitely the cause behind the transfer case grinding noise that you were hearing. It’s very common for snap rings to break especially where they are used in similar applications.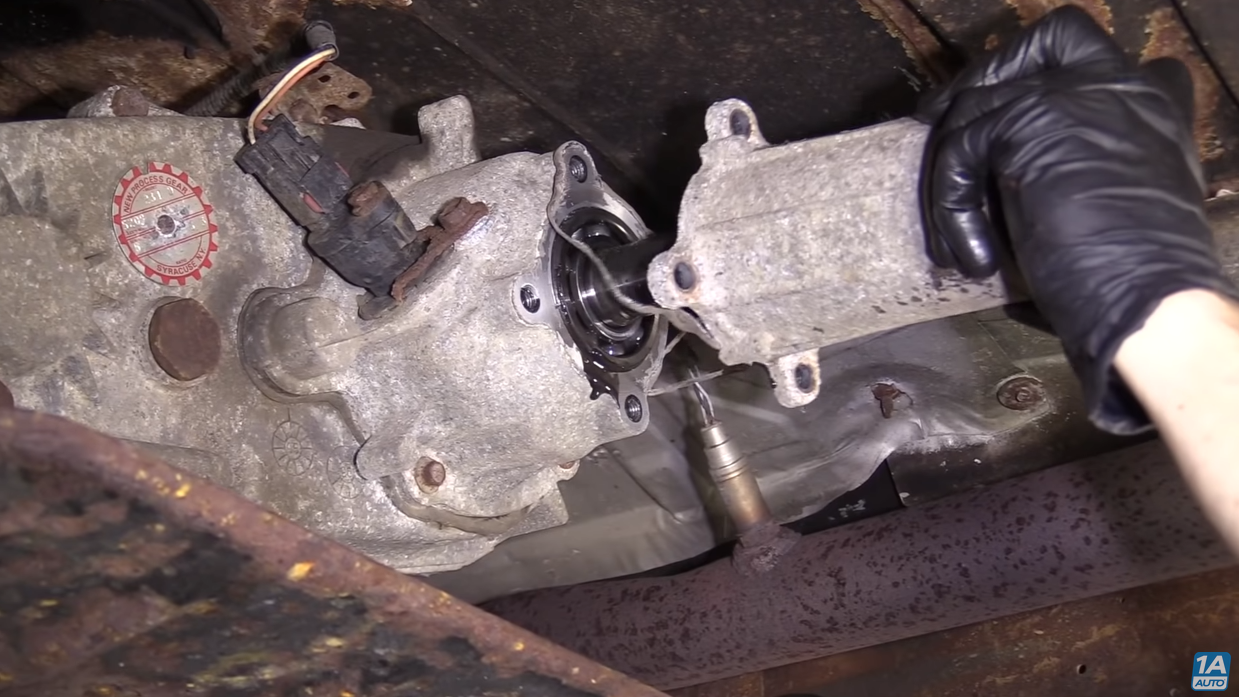
- Replace the Snap Ring to Eliminate Transfer Case Grinding Noise
If you want a more durable solution, it’s best to replace the snap ring with a locking ring. The latter comes with a lip along its edge that is of the same width as the snap ring. If you pull the output shaft out slightly, you should see the groove where the snap ring was supposed to ride.
- Secure the Locking Ring
You’ll want to secure the locking ring on the same groove. Screw both halves in place and ensure the bolts are torqued to the manufacturer’s specifications. If you’re putting in a new snap ring, all you’ll have to do is slide it in there.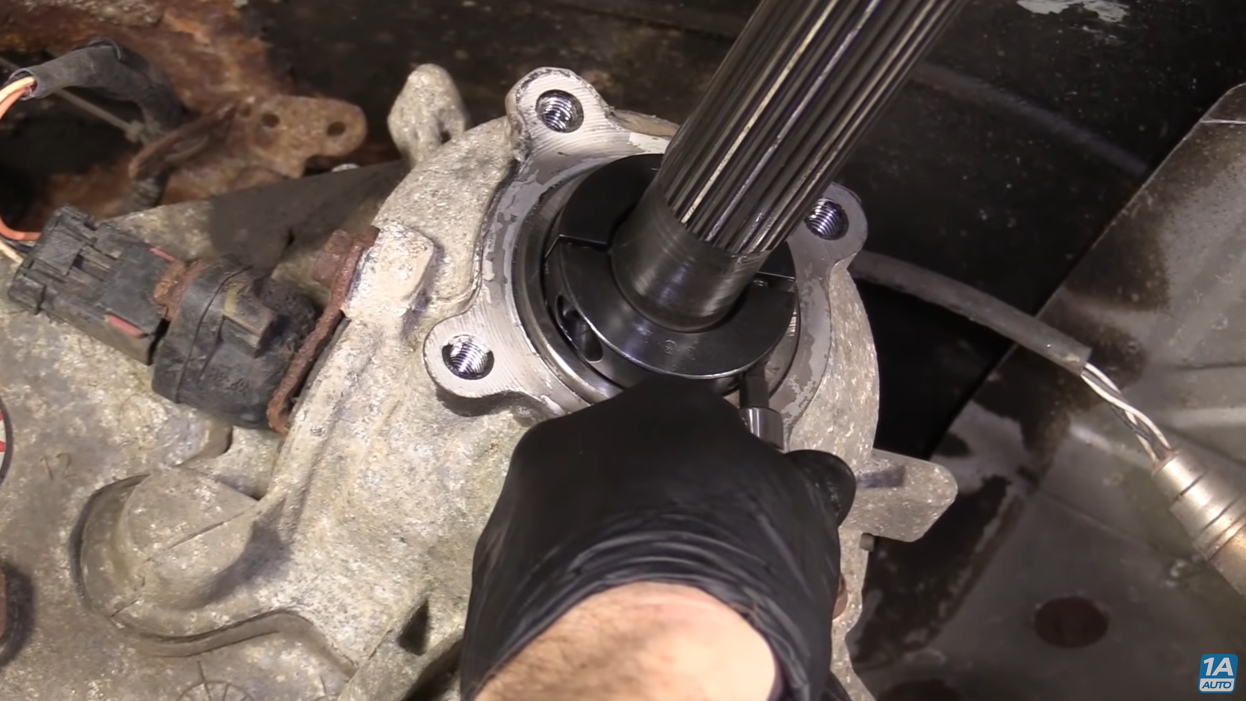
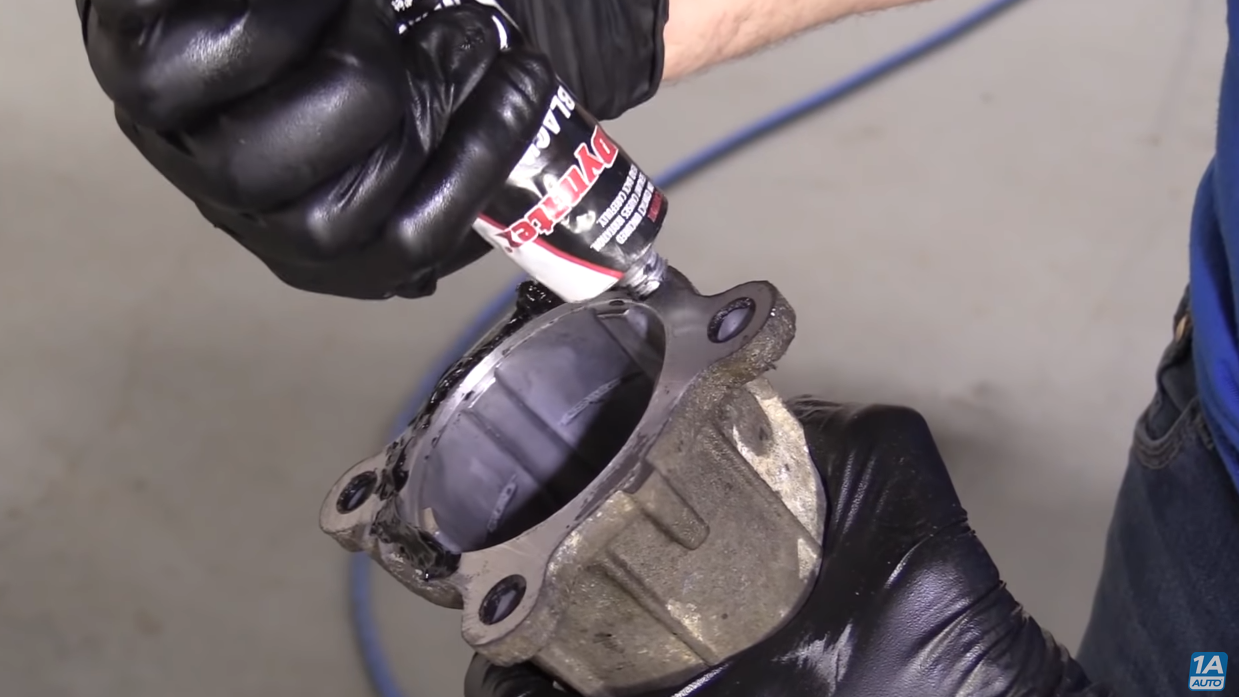
- Clean the Area Surrounding the Output Shaft
Pick a razor blade and clean the area surrounding the output shaft to remove any residual gunk. Clean the contact area on the tail shaft housing using some parts cleaner. Once done, you’ll want to apply some gasket maker. Use your gloved finger to spread the maker evenly around the contact area.
- Reinstall the Driveshaft
When reinstalling the tail shaft housing, make sure the weep hole that’s on the seal is facing down. Torque all the bolts to the manufacturer’s specifications. Before sliding the driveshaft back into the transfer case output shaft, wiggle its U joint to ensure it’s not frozen.
Remember to clean off any gunk that may have accumulated on the rear differential end yoke. Also, remove the tape that was holding the caps on the drive shaft before you screw it back into place. Make sure the markings you had previously made align with each other and that the bolts are torqued to the manufacturer’s specifications.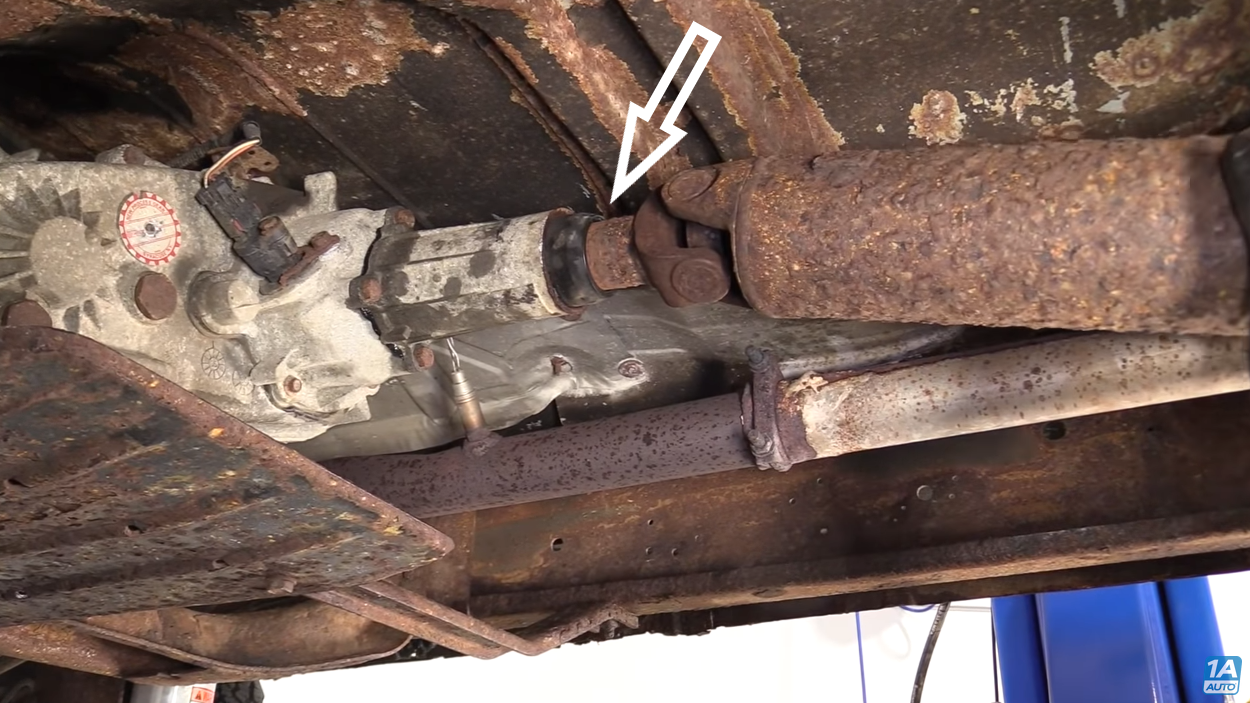
- Check and Replace the Transfer Case Fluid
In most GM trucks, the transfer case is protected from problems and damage from road debris by a metallic shield. You’ll need to take that out first before unscrewing the fill plug. This allows you to have some room to drain the transfer case fluid that’s inside. Remember to have a drain pan or bucket underneath to collect the fluid.
You can catch some of the old oil in a clear plastic cup to inspect it. Any metallic particles are evidence that there are transfer case problems. This mostly happens in older trucks that have been pushing snow or towing heavy items for years with little to no maintenance.
Before putting in some new transfer case fluid, you’ll need to flush out any residual oil that is inside the transfer case. Do this by adding some new oil and letting it drain out together with the old oil. This makes sure the new gear oil you’ll add does not get contaminated.
Once done, tighten the drain bolt and torque it to the manufacturer’s specifications and then add some new transfer case fluid. Let it completely fill through the fill hole. Once that’s done, screw the fill hole bolt and the metallic shield back in place and take your car for a road test. Replacing the snap ring should help eliminate the transfer case grinding noise.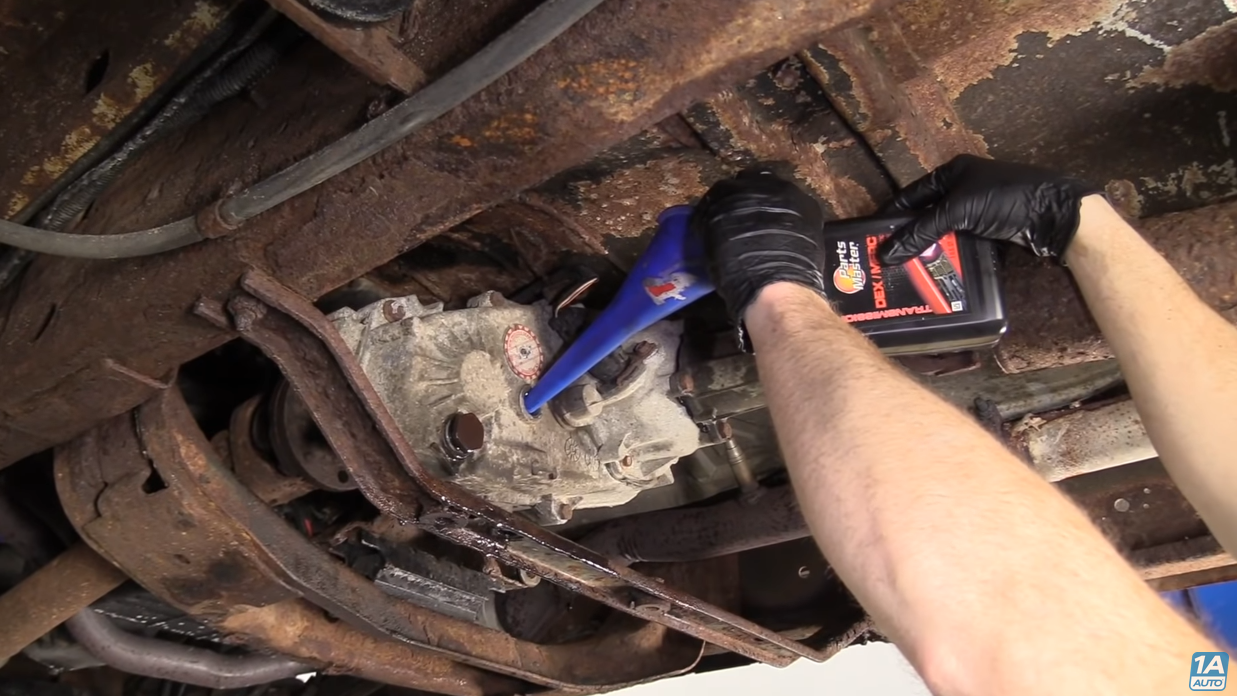
Shop Parts and Tools in This Article

Content Related to Common Transfer Case Problems
- Vibration Under Acceleration? How to Check Carrier Bearings and U-Joints
- The 5 Most Common 2nd Gen Ram Problems
- Common Problems on the 1994-04 Chevy S10
- Rear End Noise? Diagnose & Fix a Rear End Differential Problem
- Difference Between AWD and 4WD

I have a 2006 Dodge Ram 2500 4×4. Recently, when I engage the 4wh option, I get a hard knocking when accelerating. Decelerating, not so much. It is only in 4WH. 2WH is quiet. I’ve checked: Transfer case fluid, front differential gear oil, Transmission fluid. I disengaged the rear wheels and rotated the front differential, both tires, all is very quite with no play in the U joints. Rear drive shaft and U joints are fine too. Any ideas on this?